Building an ADU in California is one of the smartest investments a homeowner can make. This is thanks to new state laws designed to meet our housing needs.
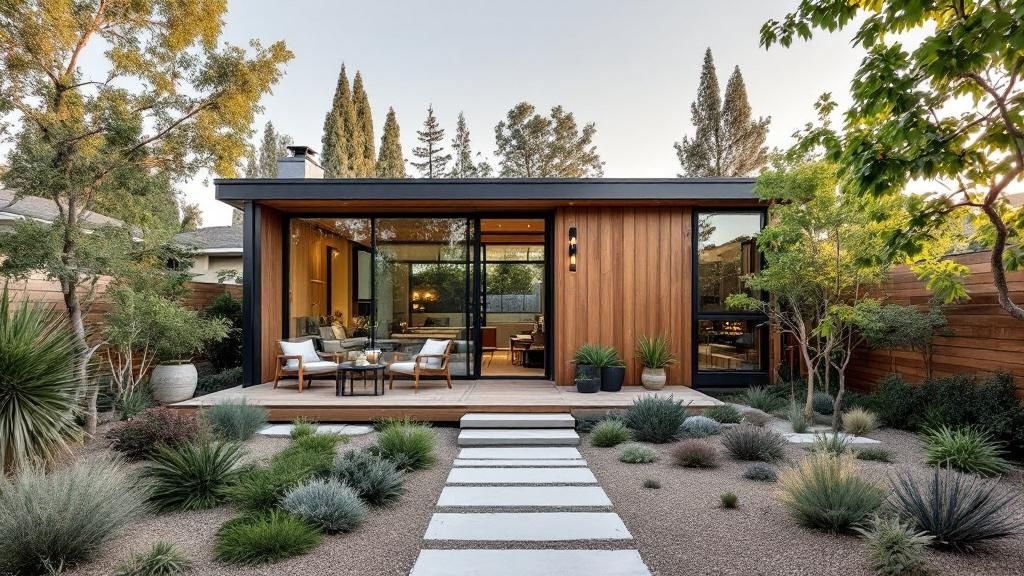
An Accessory Dwelling Unit, or ADU, adds very flexible living space to your property. It can boost its value, provide a private home for family, or generate rental income. This guide gives homeowners in Monterey, Santa Cruz, and San Benito Counties a clear path for their projects.
Why Building an ADU in California Is a Smart Move
California's housing market is always changing, and ADUs are a big part of that change. State laws now make it easier than ever to build.
An ADU isn't just a trend. It’s a real solution to modern housing challenges that uses the hidden potential in your backyard.
This rise in popularity is due to new laws that have made ADU construction much simpler. These laws have sparked a building boom across the state.
In fact, ADUs accounted for 20% of all new housing in California in 2023. That's double what we saw in 2020. You can read more about the latest legislative changes that are simplifying the ADU construction process.
The Key Benefits of an ADU
An ADU is more than just extra space. It is a flexible asset that changes with your family’s needs over time.
- Financial Flexibility: An ADU can be a steady source of rental income. This can help you pay your mortgage or other living costs. In areas like Santa Cruz and Monterey, that rental income can be large.
- Increased Property Value: Adding a legal, permitted living space to your property is a sure way to increase its market value. Buyers love the extra options and income potential.
- Multigenerational Living: These units are perfect for aging parents, adult children, or other relatives. It lets families stay close while giving everyone their own space.
By turning unused yard space into a functional home, you make a sound financial investment and add a valuable housing solution to your community.
Working with an expert local builder like Aldridge Construction is key. We manage the whole process for you. We understand local zoning in San Benito County, secure permits, and oversee all construction phases.
California ADU Laws and Local Zoning
Before you start building an ADU in California, you must understand the rules. There are statewide regulations and your local city or county zoning rules.
Both sets of rules decide what, where, and how you can build. Understanding them from the start is key to getting your project approved.
Think of state laws as the foundation for your project. They set minimum standards that local governments cannot ignore. The goal was to reduce red tape and encourage more ADU construction.
What California State Law Guarantees
Thanks to recent state laws, building an ADU is more direct than ever. These laws give homeowners certain rights. If your project meets specific criteria, your local government must approve it.
Here are some of the key state rules:
- Setback Requirements: State law allows side and rear setbacks for an ADU to be as little as four feet. This is great for homeowners with smaller lots.
- Minimum ADU Allowance: Every residential property can build at least one ADU up to 800 square feet. This is allowed no matter your lot size, as long as it meets height and setback rules.
- Parking Exemptions: You often don't need to add a parking spot for your ADU. This is true if your property is near public transit, in a historic district, or if the ADU is part of your existing home.
- No Owner Occupancy: The state removed the rule that the owner must live in either the main house or the ADU. This gives you more flexibility as a rental property owner.
These statewide rules act as a floor, not a ceiling. They establish the minimum rights you have as a homeowner.
How Local Zoning Adds Another Layer
While state laws are a good starting point, local rules can be tricky. Your local city or county planning department adds its own requirements. This is where building an ADU in California can get confusing.
Cities like Monterey, Santa Cruz, or San Benito can regulate things like design, materials, and placement. For example, a historic district in Santa Cruz may have strict design rules. They might require your ADU's exterior siding and window styles to match your main house.
If your property is in the coastal zone of Monterey County, you may need an extra review from the California Coastal Commission. This can add more rules to protect public views or habitats.
This is why working with an expert local builder is so important. At Aldridge Construction, we have years of experience with the unique rules across the Central Coast. We can anticipate challenges and help your project move smoothly through approvals. To learn more, read our detailed guide on California ADU requirements.
How to Plan Your ADU Design and Budget
Now you understand the legal side. Let's get to the fun part: bringing your vision to life and setting a budget.

First, decide the main purpose of your ADU. How you plan to use this space will guide every decision you make, from the floor plan to the finishes.
Defining Your ADU's Purpose
Before you sketch a layout, ask yourself what you want the unit to do. This clarity will guide your design and help you spend money wisely.
- A Rental Income Generator: If your goal is rental income, your design should be durable and private. This means a separate entrance, a small patio, and tough materials like LVP flooring and quartz countertops.
- A Home for Family: If you're building for aging parents, comfort and accessibility are key. Think about a single-story layout, wider doorways, and a walk-in shower with grab bars.
- A Flexible Workspace or Studio: For a home office or studio, you might want an open layout with lots of natural light. You would focus on extra electrical outlets and high-speed internet wiring.
The best ADU projects are those where the design perfectly matches the purpose from the start.
Choosing the Right Type of ADU
Once you know the "why," you can figure out the "what." California law allows a few different ADU types.
Garage Conversions are often the cheapest option because you start with an existing building. You have less disruption but are limited by the garage's footprint.
Attached ADUs are built onto your main house. This is great for an "in-law suite" and can simplify utility hookups.
Detached New Construction offers the most freedom and privacy. It is usually the most expensive but gives you the most flexibility in design and often adds the most value.
Creating a Realistic ADU Budget
Building an ADU is a major investment. A solid budget is critical. The final price depends on the ADU type, size, site conditions, and quality of finishes.
It's smart to look into financing. exploring options like a HELOC or refinancing your mortgage is a common way to pay for the project. At Aldridge Construction, we provide clear, line-item estimates.
For a detailed look at costs, see our guide on the cost to build an ADU. It focuses on projects in the Monterey Bay area.
Sample ADU Construction Cost Breakdown in Monterey County
This table shows a typical cost breakdown for a new 800 sq. ft. detached ADU.
| Expense Category | Estimated Cost Range | Key Details |
|---|---|---|
| Soft Costs | $20,000 – $35,000 | Includes architectural design, engineering, surveys, and city permit fees. This is the pre-construction planning phase. |
| Site Preparation | $10,000 – $25,000 | Costs for grading, excavation, utility trenching, and demolition of any existing structures. Varies greatly with site conditions. |
| Foundation | $15,000 – $25,000 | Poured concrete slab or raised foundation. Cost depends on soil conditions and ADU size. |
| Framing & Exterior | $50,000 – $75,000 | Lumber, labor, roofing, siding, and installation of windows and doors. The "shell" of your ADU. |
| Utilities (Plumbing & Electrical) | $25,000 – $40,000 | Rough-in and final installation of all plumbing, sewer lines, electrical wiring, and the main service panel. |
| Interior Systems (HVAC & Insulation) | $12,000 – $20,000 | Heating, ventilation, air conditioning system, and all wall/ceiling insulation. Crucial for comfort and energy efficiency. |
| Interior Finishes | $40,000 – $65,000 | Drywall, paint, flooring, cabinetry, countertops, tile, and all finish carpentry. This is where your style choices shine. |
| Fixtures & Appliances | $10,000 – $20,000 | All plumbing fixtures (sinks, faucets, toilet), lighting, and major appliances (stove, fridge, washer/dryer). |
This shows that "hard costs" like framing make up most of the budget. But "soft costs" for planning and permits are a big upfront investment.
Here are the main cost areas for any ADU project:
- Soft Costs: These are pre-construction expenses like design fees, engineering, and permit fees. They make up 10-15% of your total budget.
- Site Preparation: This is work to get your land ready. It can include demolition, tree removal, and digging trenches for utilities.
- Construction (Hard Costs): This is the biggest part. It covers labor and materials to build the unit, from the foundation to the roof.
- Finishes and Fixtures: This is where you add your personal style. Your choices in cabinets, countertops, flooring, and lighting all add up. Using quality, energy-efficient Milgard windows is a smart long-term investment.
The ADU Permitting and Building Process
You have your design and budget. Now it's time to turn those plans into a real building. Understanding the steps will keep your project moving smoothly.
This process has a predictable timeline. The graphic below shows the key stages.
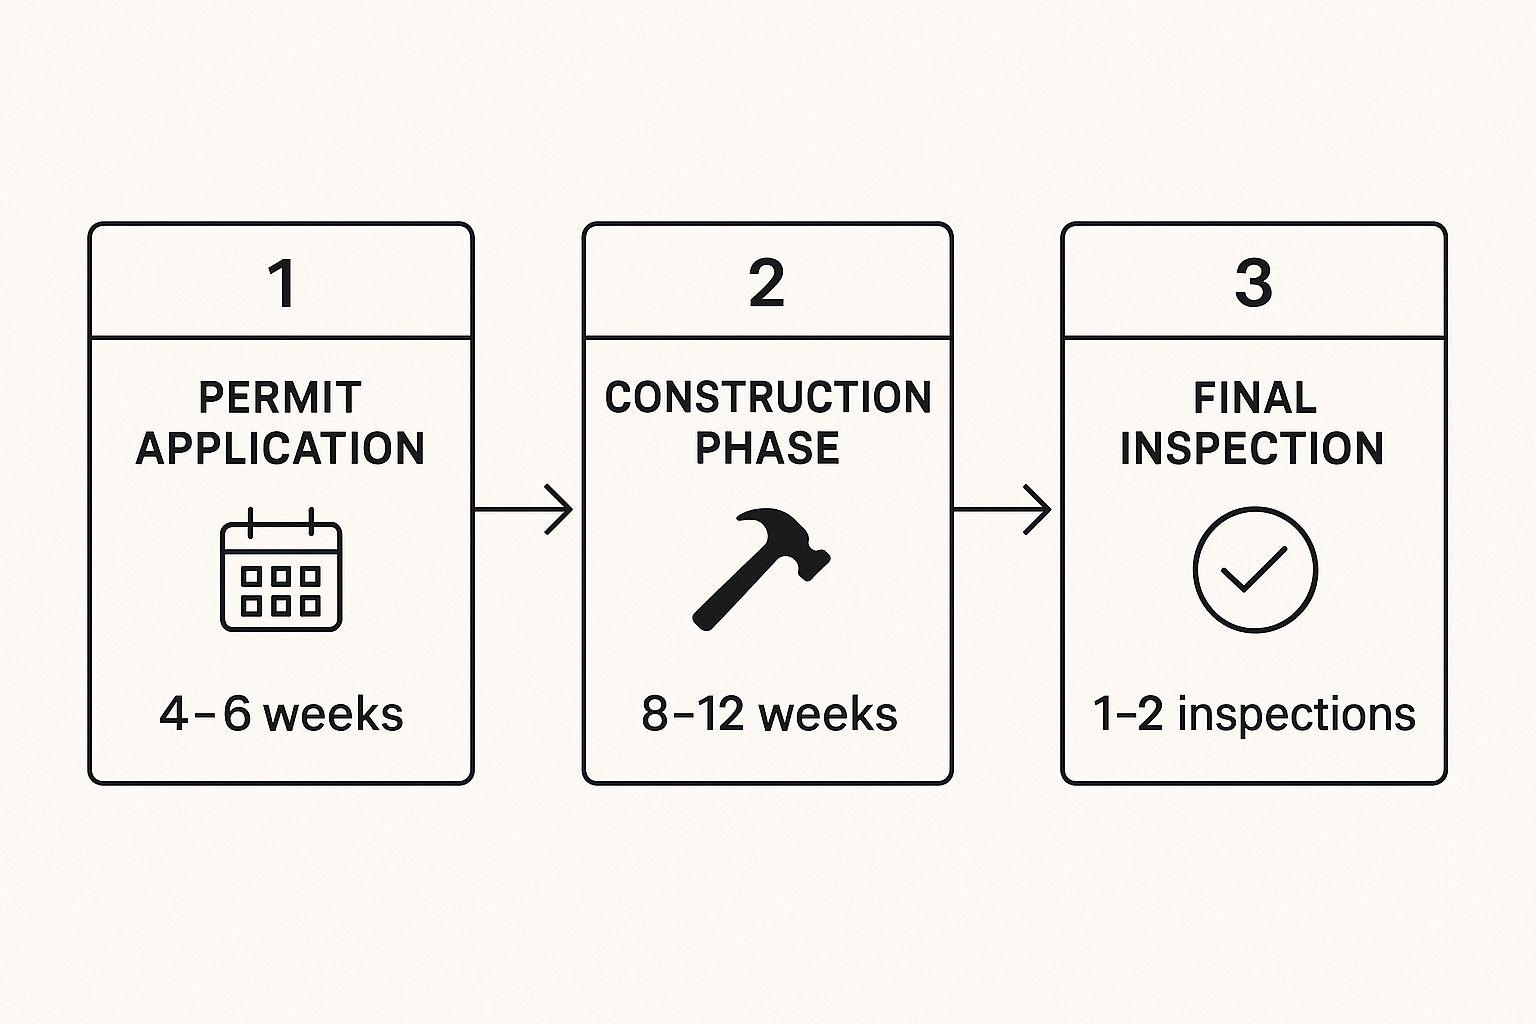
You should plan on the permitting process taking one to two months. Construction will take another two to three months before you get final approval.
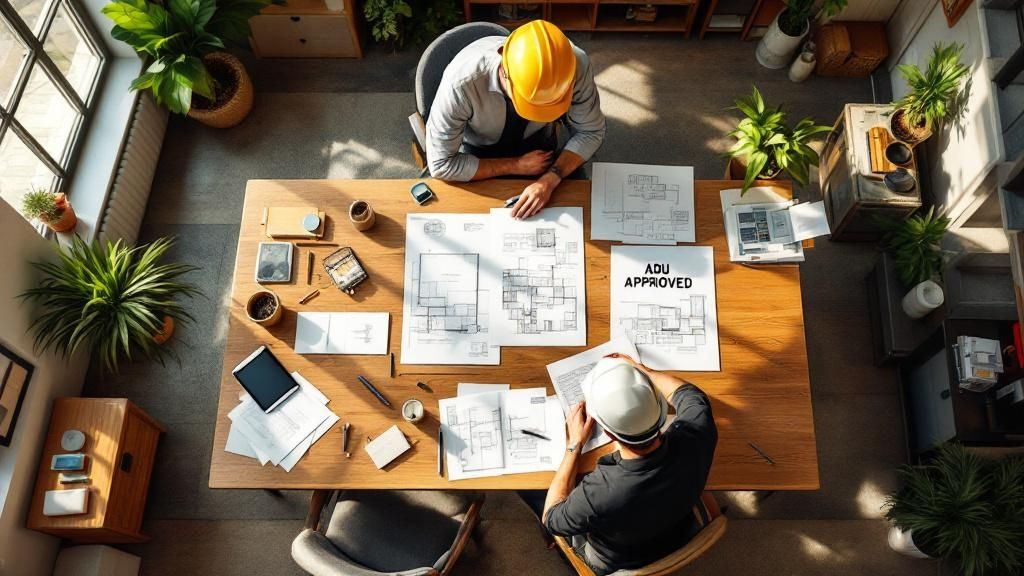
Demystifying the Permitting Phase
Before you start digging, you need a permit from your local government. This means submitting detailed construction documents to your city or county building department.
Your permit application includes several key documents:
- Architectural Plans: These drawings show the floor plan, elevations, and placement on your property.
- Structural Engineering Reports: A licensed engineer must create and approve plans showing the ADU is safe and meets all codes.
- Title 24 Energy Calculations: This report must prove your ADU meets state energy efficiency standards for insulation, windows, and HVAC systems.
City plan checkers will review everything. It is normal for them to ask for small changes. An experienced contractor can handle this efficiently.
This review process hasn't slowed down ADU growth. In 2023, a record 26,924 ADU permits were issued in California. This is due to simpler state laws and local programs.
Pro Tip: A complete, professional permit application is the most important factor for a smooth approval. Getting every detail right from the start prevents costly delays.
The Construction Sequence Unpacked
With your permit approved, the building begins. An ADU is built in a specific order, with inspections at key stages.
Foundation and Framing
First is site work. The land is graded and trenches are dug for utilities. Then, the concrete foundation is poured.
Once the concrete is set, the framing crew builds the walls, floors, and roof. You will see your ADU take shape quickly during this phase.
Rough-Ins and Exterior Finishes
Next, tradespeople install the internal systems. This is the "rough-in" phase. Plumbers run water and sewer lines, and electricians run wiring.
At the same time, the exterior is made weatherproof. Crews install the roofing, windows, doors, and siding.
Insulation and Interior Finishes
After the rough-in work passes inspection, insulation is added to the walls. Then, drywall is hung and finished.
Now, your design choices come to life. The final steps include:
- Painting: The interior is painted.
- Flooring Installation: Your chosen flooring is installed.
- Cabinetry and Countertops: Kitchen and bathroom cabinets and countertops are put in.
- Final Fixtures: Plumbers and electricians install sinks, faucets, light switches, and outlets.
For ideas on how these elements come together, see our gallery of ADU design ideas.
Final Inspection and Move-In
The last step is the final inspection. A city inspector checks the finished ADU to ensure all work was done to code.
Once you pass, the city issues a Certificate of Occupancy. Your ADU is officially ready for you, your family, or tenants to move in.
Step 4: Secure Funding And Budget Accurately
Now for the big question: how much will this cost? Getting your finances in order is a critical step. A solid budget covers everything from city fees to the final coat of paint.
ADU Construction Costs in California
Building in California can be expensive. ADU construction costs can range from $150,000 to $450,000 or more. The final price depends on a few key factors:
- Size and Type: A garage conversion costs less than a new, two-story detached unit.
- Finishes: High-end finishes like marble countertops will cost more than standard options.
- Site Conditions: A steep hill or complex foundation can add thousands to the cost.
- Location: Building costs vary across the state. A project in San Francisco will cost more than one in Fresno.
Expert Tip: Always add a contingency fund of 10-15% to your budget for unexpected issues. This can save a project from problems like a burst pipe or surprising soil report.
Exploring Your Financing Options
Most homeowners do not pay for an ADU with cash. There are many ways to finance your project.
Here are the most common options:
- Cash-Out Refinance: You refinance your mortgage for more than you owe and take the difference in cash.
- Home Equity Line of Credit (HELOC): A HELOC acts like a credit card using your home's equity. You can draw funds as needed to pay contractors.
- Construction Loan: These are short-term loans for building projects. The bank releases funds as work is completed.
- Renovation Loan: Options like the FHA 203(k) loan combine the renovation cost into your mortgage.
Talk to a mortgage broker who understands ADU financing. They can help you find the best option.
Thinking About ROI and Future Income
Building an ADU is a big financial decision, but it can pay off. You are creating a valuable asset. The potential for a high home renovation return on investment is high in California's housing market.
If you rent out your new unit, you will have a steady income stream. This can help you pay off the construction loan faster. Remember that rental income has tax rules. It’s smart to review a landlord's guide to taxes on rental income early on.
Frequently Asked Questions About Building an ADU
As you plan your ADU project, many questions will come up. Here are some simple answers to the most common questions we hear from homeowners.
How long does it really take to build an ADU?
A realistic timeline from start to finish is usually between 7 and 13 months. The design and permitting phase often takes 3 to 6 months.
Once you have permits, construction can begin. A new, detached ADU can take 4 to 7 months to build. Simpler projects like garage conversions are often faster.
Can I build an ADU on my property in Monterey County?
For most homeowners in Monterey County, the answer is yes. State laws allow properties with an existing home to build at least one ADU.
Local Monterey County rules will still apply to things like size and design. But these local rules cannot stop you from building. The best way to be sure is to get a professional feasibility check of your property.
What is a realistic ADU budget in the Santa Cruz area?
ADU costs vary based on size, site conditions, and finishes. To help you plan, here are some typical cost ranges for the Santa Cruz area:
- A simple garage conversion often starts around $120,000.
- A brand new, detached ADU can run from $250,000 to over $450,000.
It is very important to get a detailed estimate from your builder. This ensures you have a clear financial picture. Our guide on what an ADU means in construction can help you understand all the parts involved.
Will my ADU need new utility connections?
This often depends on the size of your ADU. For units under 750 square feet, state law prevents many utility providers from charging expensive "impact fees." This can save you thousands of dollars.
You will still need to budget for the work of connecting your ADU to water, sewer, and power. We coordinate with local utility companies early to get a clear estimate of these costs.
What are the biggest mistakes to avoid?
The most common mistakes are underestimating the budget, not understanding local zoning rules, and hiring a contractor who does not specialize in ADUs.
You can avoid these problems by planning ahead. Create a detailed budget with a 10-15% contingency fund. Most importantly, work with a specialized local builder who knows the rules in your city and has a strong portfolio of ADU projects.
Ready to see what's possible on your property? The team at Aldridge Construction has the local expertise to guide you through every step, from the first design sketch to the final walk-through. Contact us today for a consultation.