Before you pick up a tool, the most important part of any bathroom repair is figuring out what’s wrong. A successful fix, whether it’s a dripping faucet or a cracked tile, depends on a correct diagnosis. This step is the difference between a quick fix and a repair that you have to do over and over.
You need to take a moment to inspect the problem. Be honest about whether you can handle the job yourself or if it’s time to call a professional.
Your First Steps in a Bathroom Repair Project
A smart bathroom repair starts long before you open your toolbox. This first look tells you how big the problem really is. For homeowners in Monterey and Santa Cruz Counties, the coastal humidity can cause hidden moisture problems. You have to be extra careful. In a dry climate like Maricopa County, Arizona, we often see seals and caulk that have become dry and cracked.
Starting a fix without a clear plan can turn a small issue into a costly nightmare. That dripping faucet might seem simple, but is it a worn-out washer or a rusty valve seat? Crumbling grout could just be old, but it could also be a sign of water getting behind your tiles. A few minutes of investigation now will save you hours of work later.
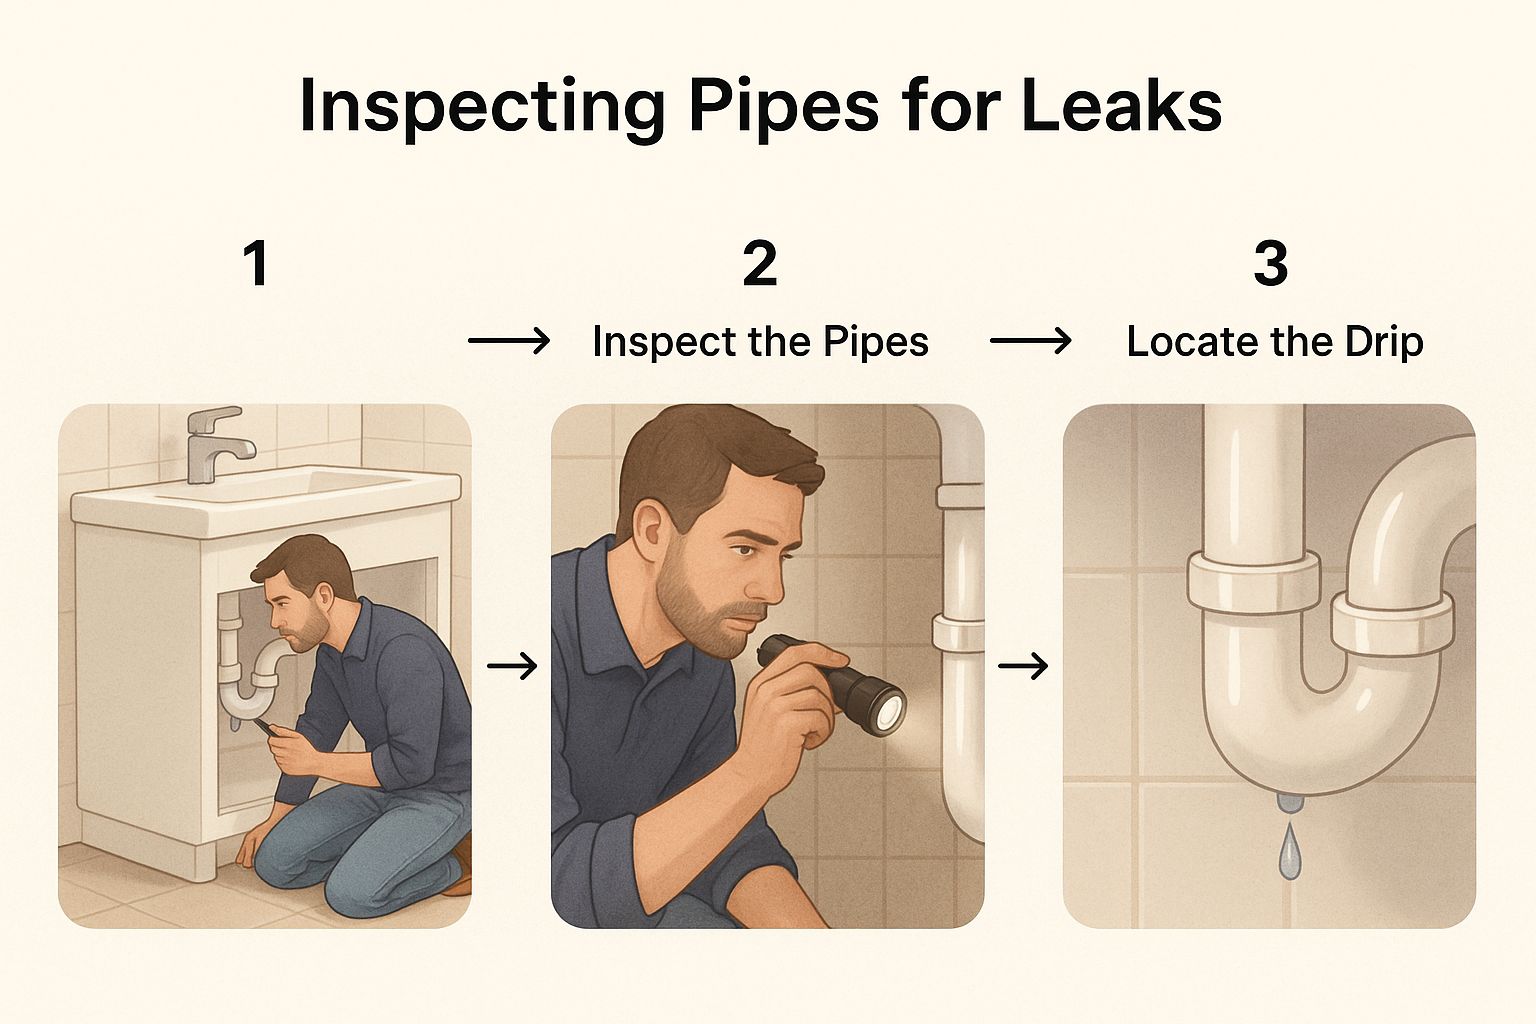
Identifying the Real Problem
You need to be a detective. The problem you see is often just a clue to a deeper issue. For example, a water stain on the ceiling below your bathroom is a symptom, not the problem. The real problem might be a leaking shower pan or a failed wax ring on your toilet.
To find the cause, focus on these key areas:
- Leaks: Don't just look for drips. Feel for soft spots in the floor around the toilet and tub. Check for dark spots on the walls. A musty smell is a big sign of hidden moisture.
- Tile and Grout: Look closely at your grout lines. Are there cracks? Is it crumbling or dark with mildew? Tap on the tiles gently. If you hear a hollow sound, the tile is loose.
- Fixtures: For a toilet that won't stop running, take the tank lid off and watch the parts move. With a leaky faucet, find out if the drip is coming from the spout or the base.
A classic mistake is treating the symptom instead of the cause. We’ve seen people re-caulk a shower corner again and again, but the problem never goes away. They are not fixing the real issue, which could be anything from wall movement to water getting behind the tile.
DIY vs. Calling a Professional
Once you understand the problem, it’s time to decide: can you handle this yourself? Many small repairs are perfect for a handy homeowner. But some jobs are best left to a professional contractor like Aldridge Construction.
Here’s a good way to think about it:
- DIY-Friendly Jobs: Replacing a faucet washer, snaking a clogged drain, changing a toilet flapper, or re-caulking a tub are great weekend projects. They use basic tools, and the risk of causing major damage is low.
- When to Call a Pro: Call a licensed contractor for anything that involves moving plumbing lines, replacing a shower valve inside a wall, or repairing water damage to the subfloor. Any project that requires a permit in San Benito County should be handled by a professional who knows local building codes.
Gathering Your Essential Tools and Materials
There's an old saying: "the right tool for the right job." It couldn't be more true for bathroom repairs. Having your gear ready makes the fix smooth and safe. A well-organized toolkit saves you trips to the hardware store and sets you up for success.
The best way to prepare is to group your needs into a few key categories. This keeps you from buying tools you'll never use again.
Core Plumbing Tools
Even for a simple plumbing job, a basic set of tools is essential. These wrenches are designed for the tight spaces you’ll find under sinks and behind toilets.
- Basin Wrench: This odd-looking tool helps tighten or loosen faucet nuts. Its long handle can reach deep into sink cabinets.
- Adjustable Wrenches: You'll want at least two different sizes. They are needed for gripping supply line nuts without stripping the metal.
- Plumber’s Tape: This thin white tape is very important. Wrapping it around pipe threads creates a watertight seal that prevents slow leaks.
- Tongue-and-Groove Pliers: Many people call these Channellocks. They're perfect for gripping larger nuts and pipes.
If you're building your kit from scratch, check out a list of essential plumbing tools every homeowner needs.
Tile and Grout Repair Kit
Fixing cracked tiles or crumbling grout requires a special approach. Using the wrong tools can damage the surrounding tile. This can turn a small fix into a major project.
A smart repair always starts with a good look. Use a flashlight to check hidden spots, like under the sink, where small drips often go unnoticed.
This simple check is the first step in gathering the right tools and materials for the job.
For materials, make sure you get 100% silicone caulk. It provides a flexible, waterproof seal for joints where walls meet the tub or countertop. For setting new tile, you’ll need the right thin-set mortar for your specific tile, like ceramic or porcelain.
To Rent or To Buy? Making the Smart Call
Not every tool is worth owning. Local rental shops in Monterey County or Maricopa County are great for specialized equipment. This saves you from buying expensive tools you might only use once.
Pro Tip: For a one-time tile repair, renting a wet tile saw is much cheaper than buying one. However, investing in a quality caulk gun is always a smart move.
To help you decide, here’s a quick breakdown of common repairs.
Repair Cost vs. Scope Comparison
This table gives you an idea of what different bathroom jobs involve. It compares the scope, DIY costs, and when it’s time to call us.
| Repair Type | Typical Scope | Estimated DIY Cost | When to Call Aldridge Construction |
|---|---|---|---|
| Leaky Faucet | Replacing washers or O-rings in a single faucet. | $15 – $30 | If the leak persists or the faucet body is cracked. |
| Cracked Tile | Removing and replacing 1-2 individual tiles. | $40 – $75 | If multiple tiles are damaged or the subfloor is wet. |
| Running Toilet | Replacing the flapper, fill valve, or flush mechanism. | $25 – $50 | If the leak is coming from the toilet base. |
| Clogged Drain | Clearing a simple clog with a snake. | $10 – $40 | For deep clogs or recurring blockages. |
| Regrouting Shower | Scraping out old grout and applying new grout. | $80 – $150 | When tile damage is extensive or there are signs of water behind the walls. |
| Full Shower Remodel | Demolition, new plumbing, waterproofing, and retiling. | $1,500+ | This is a major project best left to professionals. |
Making smart choices about your tools saves money and ensures a high-quality, lasting repair.
Solving Common Bathroom Plumbing Problems
Plumbing issues can feel like a nightmare. But many common problems are manageable with a little knowledge. From a dripping faucet to a running toilet, these small annoyances can waste a lot of water and money.
Tackling these repairs yourself is a great way for homeowners in San Benito County, CA, and Maricopa County, AZ, to build confidence and save money.
Before you start, remember the golden rule: always turn off the water supply. Find the shutoff valve on the wall behind your toilet or under the sink. Turn it clockwise until it stops. If you can't find one, shut off the main water supply to your house.
Fixing a Constantly Running Toilet
A running toilet is a common cause of a high water bill. The hissing sound usually means water is leaking from the tank into the bowl. Most of the time, a faulty part inside the tank is the problem.
Often, the fix is as simple as replacing the flapper. This is the rubber seal at the bottom of the tank. Over time, flappers can warp and stop creating a good seal. Another common issue is an improperly set float, which tells the fill valve when the tank is full.
- Check the Flapper: After a flush, press down on the flapper. If the running sound stops, you’ve found the problem. Replacement flappers are cheap and easy to install.
- Adjust the Float: If the water level is too high, you’ll need to adjust the float. On older toilets, you might bend the float arm down slightly. Newer toilets usually have an adjustment screw.
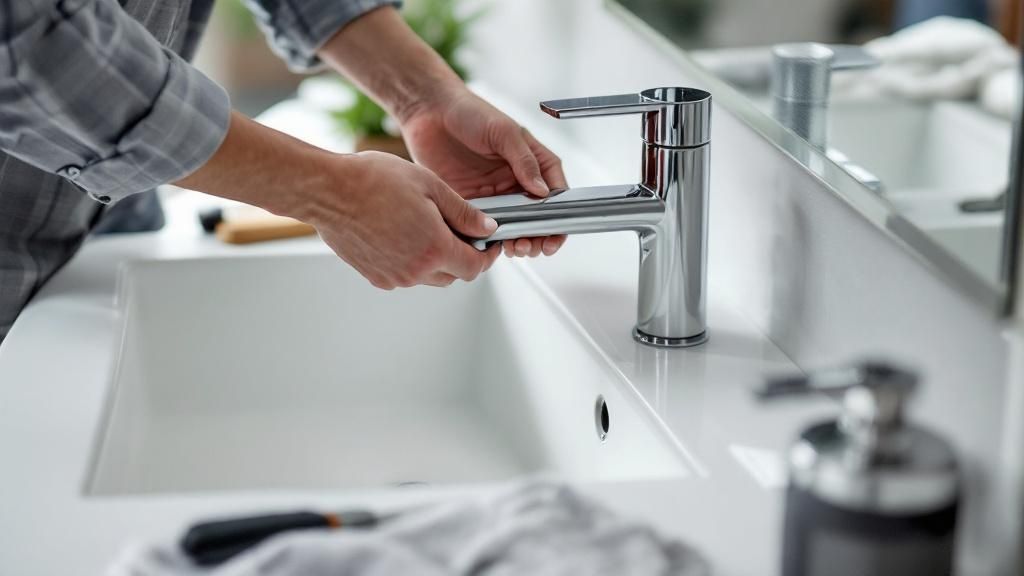
Stopping That Annoying Leaky Faucet
A constant drip is irritating and wastes water. Most faucet leaks are caused by a worn-out washer or O-ring inside the handle. Learning how to fix a leaking tap is a simple DIY task that can save a lot of water.
Once the water is off, take the faucet handle apart. Use a screwdriver to remove the handle, then a wrench to loosen the nut beneath it. Inside, you'll find the rubber washers that are likely causing the leak. Take the old ones to the hardware store to get an exact match.
Pro Tip: When you reassemble pipes, wrap the threads with plumber's tape two or three times in a clockwise direction. This simple step helps create a perfect, watertight seal.
Dealing with a Stubborn Clog
A slow-draining sink or shower means you have a buildup of hair and soap. Before you use harsh chemical drain cleaners, try a mechanical solution first. A simple plastic drain snake can often pull out the clog with little effort.
If that doesn't work, clean the P-trap. This is the U-shaped pipe under your sink. Put a bucket underneath to catch water, then use pliers to loosen the nuts on the U-bend. You can then pull the trap off and clean it out.
If you’ve tried these fixes and the problem is still there, it’s time to call a professional. Aldridge Construction can handle complex plumbing challenges and protect your home from water damage.
How to Repair and Replace Tile and Grout
Cracked tiles and crumbling grout are more than just ugly; they are a warning sign. They let water seep behind your walls, which can lead to mold, wood rot, and expensive damage. Learning how to repair bathroom tile is a key skill, especially in moist areas like Monterey and Santa Cruz Counties.
The good news is that fixing these issues can restore your bathroom's look and safety. You can confidently replace a single tile or refresh old grout lines. This stops small problems before they become big ones.
Replacing a Single Broken Tile
When a tile cracks, you need to remove it without harming the tiles next to it. This takes patience. The goal is to isolate the broken piece and carefully break it up for removal.
- Remove the Surrounding Grout: Use a grout removal tool to grind away the grout around the broken tile. This step is critical to prevent damage to other tiles.
- Break Up the Tile: Cover the cracked tile with a thick cloth. Use a hammer and a chisel to gently tap the center of the tile until it breaks into smaller pieces.
- Pry Out the Pieces: Carefully pry out the broken tile fragments with a small pry bar. Scrape away the old adhesive from the wall. You need a clean, flat surface for the new tile.
Setting the New Tile and Grouting
With the old tile gone, you're ready to set its replacement.
First, mix a small batch of thin-set mortar. It should have a smooth, peanut butter-like texture. Apply the mortar to the back of the new tile and press it firmly into place. Use tile spacers to keep grout lines even.
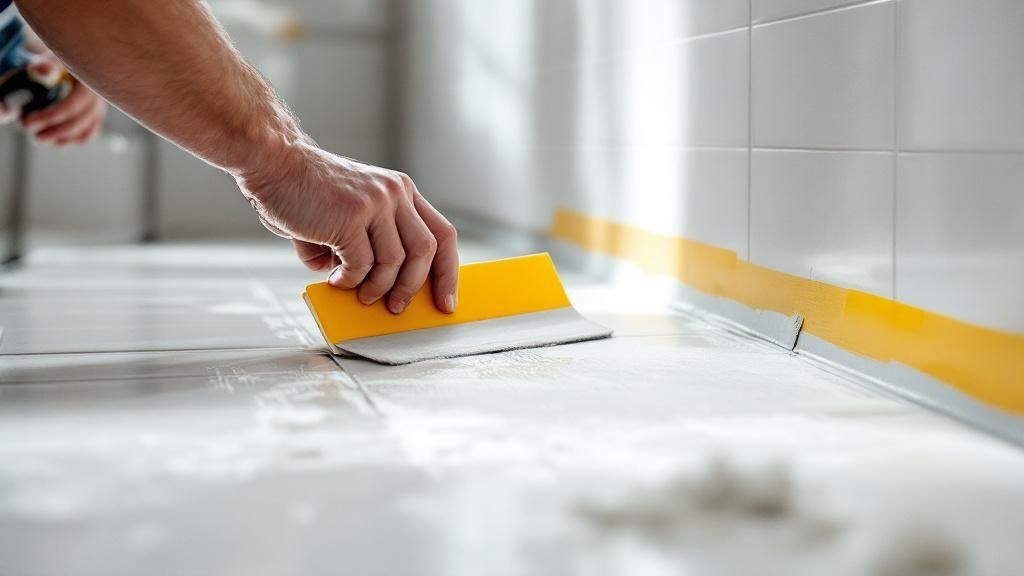
Let the adhesive cure for at least 24 hours. Do not rush this part. Once it's set, you can mix your grout and apply it with a grout float. Press it into the joints at a 45-degree angle.
Reviving and Replacing Grout
Sometimes the tiles are fine, but the grout is the problem. Discolored or crumbling grout can make a bathroom look old. You might just need to clean it. You can find expert tips for ceramic and porcelain grout cleaning to see if a deep clean will work.
If the grout is crumbling, it has to be replaced. Use a grout removal tool to scrape out the old grout. Vacuum up all the dust before applying new grout.
Expert Insight: A common mistake is using grout in a corner where tile meets a tub or countertop. These joints need to be flexible. Always use 100% silicone caulk in these areas to allow for natural movement and prevent cracks.
Finally, you must seal the new grout. After it has cured for 48-72 hours, apply a quality grout sealer. This creates a barrier against moisture and stains. It will keep your repair looking fresh for years.
Knowing When a Repair Should Be a Remodel
It's great to know how to fix small bathroom issues. But sometimes, a series of repairs is just a temporary fix for a bigger problem. A dripping faucet, crumbling grout, and a clogged drain can feel like an endless cycle.
These recurring issues are often signs that you need a full remodel.
Constant repairs mean your bathroom's parts are wearing out. This is especially true for old plumbing hidden behind walls. For homeowners in Monterey and Santa Cruz, persistent problems can also hint at hidden water damage that a simple patch won't fix.
Turning a Problem Into an Opportunity
Instead of another repair bill, think of it as a chance to invest in your home. A bathroom remodel is a strategic upgrade that improves your home’s function and value. It's a key reason bathroom remodeling is so popular. In fact, a midrange bathroom remodel can recoup 66.7% of its cost, according to Remodeling Magazine's 2024 Cost vs. Value Report.
Benefits Beyond a Quick Fix
A full remodel lets you fix problems at their source. The benefits are significant.
- Improved Home Value: A modern, functional bathroom is a major selling point.
- Enhanced Functionality: You can redesign a cramped layout to make your daily routines easier.
- Water and Energy Efficiency: A remodel is the perfect time to install water-saving fixtures. For California homeowners, this means meeting California's Title 24 energy standards. This will lower your utility bills.
By looking at the bigger picture, you can see that frustrating repairs might be your home telling you it’s time for an upgrade. It’s about shifting from a short-term fix to a long-term solution.
At Aldridge Construction, we help homeowners in Monterey, Santa Cruz, and San Benito Counties make that call. We can assess the issues and help you turn a necessary repair into a smart, lasting investment.
Frequently Asked Questions (FAQs)
1. What's the most common bathroom repair homeowners face?
The most frequent calls are for plumbing issues. Dripping faucets, running toilets, and slow drains are very common. These problems are usually caused by the wear and tear of small, inexpensive parts like rubber washers or a toilet flapper.
2. How can I tell if a bathroom leak is a serious problem?
A leak is serious when it starts affecting your home's structure. Look for these red flags:
- Water stains on the ceiling below your bathroom.
- Soft or warped flooring around the toilet or tub.
- A persistent musty smell that won't go away.
- A sudden spike in your water bill.
If you see any of these signs, act fast to prevent more damage.
3. Is it safe to just paint over mold in my bathroom?
No, you should never paint over mold. Paint only hides the problem. Mold is a living thing that will continue to grow and spread underneath the paint. You must fix the moisture source first, then clean the area with a mold-killing solution before painting.
4. How often should I recaulk my shower or tub?
As a general rule, you should recaulk these areas every 3-5 years. In humid climates like Santa Cruz County, you might need to do it more often. Check your caulk lines once a year for any cracks or peeling. A fresh bead of 100% silicone caulk is an easy way to prevent water damage.
5. Is it cheaper to repair or replace a toilet?
For most common problems, it's much cheaper to repair a toilet. Repair kits for the tank parts cost between $20 and $50. Replacing the entire toilet only makes sense if the porcelain is cracked, you're doing a full remodel, or it clogs constantly.
For projects that go beyond these simple fixes, Aldridge Construction is here to help. Contact us today for a consultation in Monterey, Santa Cruz, San Benito, or Maricopa County. We can help you explore our professional bathroom renovation services and find the best solution for your home.