When you find water flooding your home, the restoration process unfolds in a few key phases. It starts with immediate safety actions, moves to a professional assessment, and then into water extraction, thorough drying, and finally, cleaning and structural repairs. How you handle those first few moments is critical for minimizing long-term problems and costs.
Following the proper water damage restoration steps ensures your property is returned to a safe, healthy condition.
Your First Moves in a Water Damage Emergency
Discovering water pouring into your home from a burst pipe or a failed appliance is a moment of pure panic. But what you do in these first few minutes can make a massive difference in the final repair bill. The two absolute priorities are ensuring everyone is safe and stopping the water at its source.
Your most urgent task is to shut off the main water valve to your property. This is usually located where the main water line enters your house—check the garage, basement, or a utility closet. If you don't know where yours is, take a few minutes today to find it. That knowledge is priceless in an emergency.
With the water flow stopped, your next thought should be electricity. Water and electricity are a lethal mix. Get to your breaker box and shut off the circuits to all the affected rooms. This is a non-negotiable step to prevent electrical shocks.
Document Everything for Your Insurance Claim
Before moving a single piece of furniture, pull out your smartphone. You need to thoroughly document the scene with photos and videos. This evidence is essential for your insurance claim and is your best tool for getting a fair settlement.
Make sure you capture everything:
- Wide shots of every affected room to establish the overall scope of the damage.
- Close-up shots of the source of the leak, like a cracked supply line under the sink.
- Videos showing the depth of the standing water and panning across damaged items like furniture, electronics, and flooring.
- Photos of damaged personal items, both where they are and after you’ve moved them to a dry spot.
This initial documentation creates a clear "before" picture for the insurance adjuster. It proves your losses and can dramatically speed up the claims process.
Local Considerations and Initial Containment
How you respond might also change depending on where you live. For homeowners in Monterey and Santa Cruz Counties, water intrusion often comes from intense winter storms. After securing the home, the next logical step might be using sandbags or temporary barriers to keep more rainwater from getting in.
On the other hand, if you're in Maricopa County, Arizona, you might be dealing with a sudden monsoon flood or a leaky AC unit. In those scenarios, your focus should be on containment. Using towels or buckets to keep the water from spreading can save a huge portion of your home from damage while you wait for a professional team like Aldridge Construction to arrive.
While these initial water damage restoration steps are incredibly important, they are only temporary fixes. Your most critical move is contacting a certified restoration specialist. Aldridge Construction has the advanced equipment and expertise to properly mitigate the damage and begin the formal restoration process.
The Professional Damage Assessment
Once the immediate emergency is under control and your property is safe to enter, the real work begins. The next crucial phase is a professional damage assessment, which is far more than just a quick look around. This is where expertise and technology come together to uncover the true scope of the water damage.
When a certified team from Aldridge Construction arrives, they are on a mission to understand the complete picture of how water has affected your home.
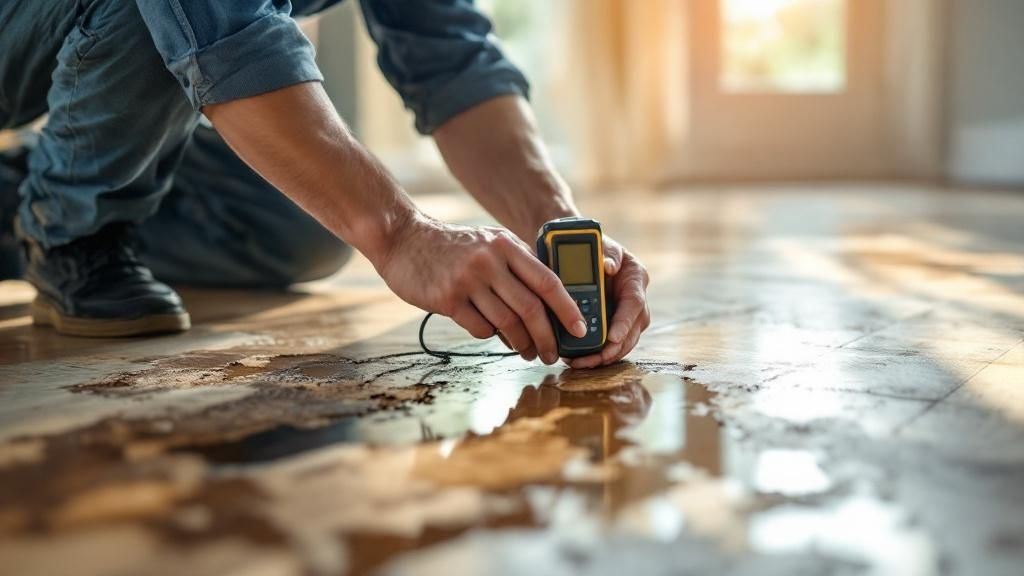
Finding Hidden Moisture with Technology
The standing water on your living room floor is the obvious problem, but the bigger threat often comes from the water you can't see. Water wicks into porous materials like drywall, wood framing, and insulation. If this hidden moisture isn't found, it’s a guaranteed recipe for widespread mold growth and serious structural decay.
To stop that from happening, technicians come armed with specialized equipment:
- Moisture Meters: These give a direct reading of moisture content in materials like drywall, wood, or carpet padding.
- Thermal Imaging Cameras: This is the go-to for mapping out the extent of the damage without tearing into walls. Wet areas are cooler than dry ones, and these cameras show exactly where the water has traveled.
- Hygrometers: These tools measure the moisture in the air (relative humidity), which helps set a "dry standard" and track progress.
This data-driven approach means the restoration plan is built on facts, not guesswork. It allows for precision, saving time, money, and preventing future headaches.
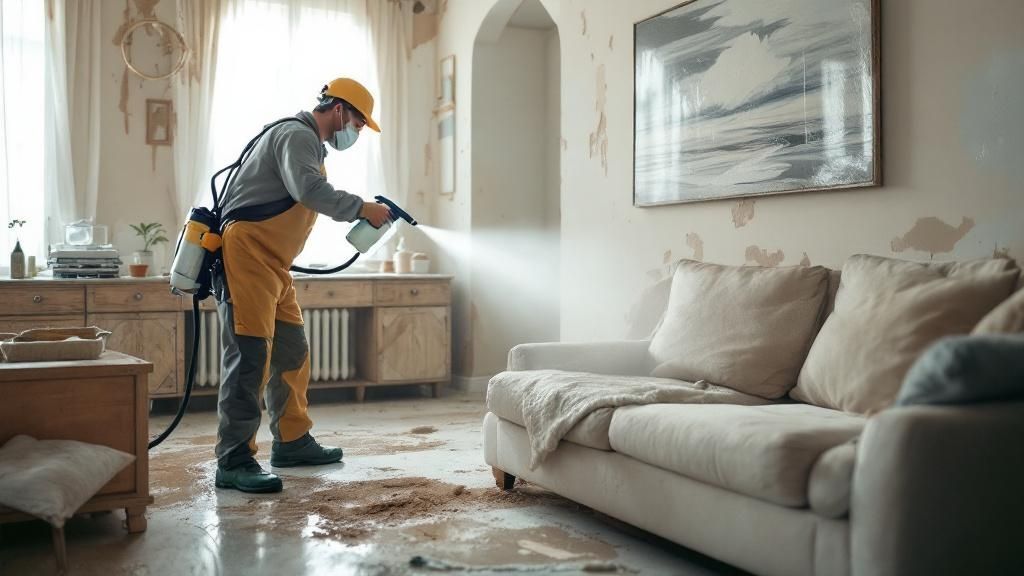
This image shows the kind of high-capacity equipment brought in for water extraction—a step guided by the detailed findings from the initial assessment.
Understanding Water Categories and Damage Classes
During the assessment, the team will also classify the type of water and the extent of the damage. These classifications are critically important. They determine exactly what safety protocols, equipment, and restoration methods are needed to do the job safely and effectively.
Before diving into the categories, it's important for homeowners to understand what they mean for their health and property.
Water Contamination Categories
| Category | Description & Source Examples | Health Risk Level | Required Action |
|---|---|---|---|
| Category 1 | "Clean Water" from sources like a broken supply line, overflowing sink or tub, or appliance malfunction. | Low | Can often be dried in place, but must be addressed quickly before it degrades. |
| Category 2 | "Gray Water" that is contaminated. Think water from a dishwasher or washing machine overflow, or a toilet with urine but no feces. | Medium | Poses a risk of sickness. Requires removal of affected porous materials like carpet padding. |
| Category 3 | "Blackwater" that is grossly contaminated. Sources include sewage backups and floodwaters from rivers or streams. | High | Poses a serious health threat. Requires full PPE for technicians and removal of all affected porous materials. |
It’s crucial to act fast, no matter the source. Clean water can quickly turn into a contaminated mess if it's left to stagnate or comes into contact with other contaminants in your home. According to the IICRC, clean water can degrade to Category 2 or 3 in as little as 48 hours.
Alongside the water category, a damage class from 1 to 4 is assigned. This describes how much water there is and how saturated materials are. Class 1 might be a small spill on tile, while Class 4 involves deep saturation of materials like concrete or hardwood.
Grasping the scope of the damage is the first step toward a successful recovery. For a deeper dive, check out this excellent a homeowner's guide to property damage assessment. This knowledge helps you understand the restoration plan and appreciate why a meticulous, data-backed strategy is the only way to get your home back to being a safe, healthy place to live.
The Professional Water Extraction Process
Once the situation is assessed, the next phase of the water damage restoration steps is a race against the clock. The goal is simple: get every possible gallon of standing water out of your home, fast. Every hour that water sits, it’s seeping deeper into drywall, flooring, and framing, raising the stakes for permanent damage.
This is where the difference between a DIY attempt and a professional response becomes glaringly obvious. When a team from Aldridge Construction arrives, they bring an arsenal of specialized equipment designed for high-volume water removal.
Powerful Tools for Every Scenario
No two water damage jobs are the same, so Aldridge Construction tailors its strategy to your property. For major incidents, powerful, truck-mounted extraction units are used. These machines have incredible suction and can pull hundreds of gallons of water per hour.
For more targeted extraction, a variety of specialized tools are used:
- Submersible Pumps: For more than two inches of standing water, these workhorses go right into the deepest point to rapidly lower the water level.
- Light-Wand Extractors: Essential for carpets, these tools push down deep into the carpet and padding, squeezing out trapped water that a surface vacuum could never touch.
- Specialty Floor Tools: Hardwoods, tile, and vinyl all need different attachments. Specific tools are used to pull water from between floorboards and out of grout lines without marring the finish.
Why Speed and Efficiency Are Critical
Getting the water out quickly isn't just for convenience—it's about prevention. Harmful mold and mildew can start to grow in as little as 24 to 48 hours in the damp aftermath of a flood. By removing the bulk water fast, mold colonies are starved of the moisture they need to thrive.
Imagine a finished basement in a Monterey home after a winter storm forces groundwater inside. The longer that water sits on the carpet, the more the pad underneath becomes a soggy mess. The mission is to extract that water so fast that the critical drying process can begin before the sheetrock and framing suffer irreversible damage.
This immediate and thorough removal of water paves the way for the next critical phase. It makes the drying and dehumidification process faster, more effective, and ultimately, more successful.
Drying and Dehumidifying Your Home
Once the standing water is gone, it’s easy to think the worst is over. But the most dangerous threat isn't the water you can see; it's the invisible moisture that has soaked deep into porous materials like drywall, wood framing, insulation, and subfloors.
This hidden saturation is a ticking time bomb for catastrophic mold growth and structural rot. If it isn't eliminated with scientific precision, the long-term damage can be far worse than the initial flood. This is where the process transitions from brute-force water extraction to a highly controlled, scientific drying process.
The Science Behind a Truly Dry Home
IICRC-certified technicians at Aldridge Construction bring in an arsenal of specialized equipment to manage your home's entire atmospheric environment. The goal is to create conditions where saturated materials release their trapped moisture back into the air, which is then captured and removed.
This process is guided by a science called psychrometry—the study of how temperature, humidity, and airflow interact. Effective drying requires a strategic combination of industrial-grade equipment.
- High-Velocity Air Movers: These powerful units are placed at specific angles to create a vortex of airflow across wet surfaces. This constant movement dramatically speeds up evaporation.
- Low-Grain Refrigerant (LGR) Dehumidifiers: These machines are the heavy lifters. They suck in humid air, cool it to condense the water vapor, and then push warm, dry air back out to absorb even more moisture.
- Desiccant Dehumidifiers: In certain situations, like colder climates or areas with dense materials, desiccant dehumidifiers are used. They use special moisture-absorbing materials (desiccants) to pull water from the air.
The Aldridge team is on-site constantly, using moisture meters and thermal cameras to track progress. This data allows for continuous adjustments, optimizing the drying environment for the fastest and most thorough results.
Adapting Our Strategy to Your Local Climate
A one-size-fits-all drying plan is a recipe for failure. The strategy used for a damp, coastal home in Monterey County is completely different from what’s needed in the dry desert heat of Maricopa County, Arizona.
In the humid air of Monterey or Santa Cruz, a closed drying system is established. The affected area is sealed off to stop outside humidity from getting in. In the dry heat of Arizona, an open drying system can sometimes be used, carefully venting humid indoor air outside while drawing in the naturally dry desert air.
Getting the drying phase right is what prevents a water damage event from turning into a long-term mold and rot problem. For instance, with flooring, understanding the best way to dry carpet after cleaning and applying those same principles on a larger scale can save it from ruin.
The growth of our industry shows just how critical this professional approach is. The water damage restoration sector in the U.S. has swelled to a market valued at over $210 billion, with a major driver being an increase in severe weather events and aging infrastructure, as noted by some restoration industry statistics. This makes professional intervention more important than ever.
Cleaning, Sanitizing, and Preventing Mold
Just because a house feels dry doesn't mean it's safe. Once the industrial fans and dehumidifiers go quiet, the next phase of water damage restoration steps is about protecting your health. The focus shifts to thoroughly cleaning and sanitizing every affected surface to eliminate any lingering bacteria, fungi, and other contaminants.
This isn't a simple wipe-down. It’s a deliberate, methodical process to make sure your home is not only clean but also completely inhospitable to mold.
Professional-Grade Cleaning and Sanitization
The restoration team at Aldridge Construction uses specialized, EPA-registered disinfectants and antimicrobial treatments that go far beyond anything you can buy at the store. These agents are designed to kill bacteria and neutralize mold spores on contact.
These treatments are applied to all exposed structural materials, including:
- Wood Studs: Getting deep into the exposed wall framing is critical to stop mold from taking root inside the structure.
- Subflooring: Before any new flooring goes down, the subfloor has to be completely sanitized.
- Drywall: Any salvaged drywall gets a thorough cleaning and treatment.
Technicians also use advanced techniques like fogging, which aerosolizes the disinfectant to reach nooks and crannies. Air scrubbers are used to capture airborne mold spores kicked up during cleaning, and proper cleaning HEPA vacuum filters is a must for trapping these contaminants.
Salvaging vs Disposing of Personal Belongings
For homeowners, this is often the toughest part of the job: deciding what stays and what goes. The Aldridge team helps walk you through these hard decisions, basing recommendations on safety, material type, and contamination level.
- Non-Porous Items: Things like hard plastics, metal, and glass can almost always be saved with proper cleaning.
- Porous Items: Soft goods like mattresses, upholstered furniture, and carpets that were soaked—especially with contaminated water—are often impossible to fully sanitize and must be disposed of.
- Semi-Porous Items: Solid wood furniture might be salvageable, depending on saturation and finish. Each piece is evaluated on a case-by-case basis.
Creating a Mold-Inhospitable Environment
Ultimately, the goal of this phase is to turn your home back into a place where mold simply can’t get a foothold. Mold needs moisture, a food source (like drywall paper or wood), and the right temperature. By killing off existing spores and applying antimicrobial coatings, a defensive barrier is created that discourages new growth.
This meticulous attention to detail is what bridges the gap between the initial cleanup and the final rebuild. It’s a core principle brought to every job, from massive restorations to ongoing property management remodeling and repair services.
Bringing Your Home Back with Final Repairs
This is where the magic really happens. After the emergency is handled, the water is removed, and every surface is confirmed to be dry and sanitary, the process shifts from damage control to the rewarding process of rebuilding. This is the final and most transformative phase of any water damage project.
This isn't just about slapping on some new paint. It's about meticulously putting the pieces back together so your home is just as you remember it—or even better than before.
From Minor Fixes to Major Reconstruction
The scope of the final repairs can look wildly different from one home to the next. For some, it might be a few straightforward tasks. For others, it’s a much larger undertaking.
Here are some of the most common jobs at this stage:
- Drywall Replacement: Technicians tape, mud, and perfectly match the existing texture so the repair is completely invisible.
- Painting: A fresh coat of paint makes a room feel finished and new, with precise color matching and a clean, professional finish.
- Flooring Installation: Aldridge Construction is equipped to replace everything from soggy carpet and padding to warped hardwood, often installing modern, water-resistant luxury vinyl plank (LVP).
- Cabinet and Fixture Installation: In kitchens and bathrooms, cabinets, vanities, toilets, and sinks are expertly reinstalled.
In more severe cases, especially those involving Category 3 blackwater, the repairs can get much more complex, involving structural wood replacement or completely rebuilding a room from the studs up.
The Advantage of a Full-Service Contractor
One of the biggest frustrations for homeowners is getting bounced between companies. Aldridge Construction eliminates that headache completely by serving as a single point of contact from the moment you call to the final walkthrough.
Because Aldridge is both a restoration company and a general contractor, the team transitions seamlessly from mitigation to reconstruction. This integrated approach is a huge benefit, particularly for large-scale projects. You might even decide to view it as an opportunity to make upgrades and explore a full home renovation in Salinas or Monterey.
Choosing Durable Materials for Future Protection
When rebuilding, the goal is to make your home more resilient. This is especially critical for homes in the coastal areas of Monterey and Santa Cruz or the monsoon-prone regions of Maricopa County. Water-resistant materials are often recommended in vulnerable spaces.
Luxury Vinyl Plank (LVP) is a fantastic choice. It gives you the beautiful look of hardwood but is 100% waterproof, making it ideal for bathrooms, basements, and laundry rooms.
The final repair stage is the rewarding culmination of the entire process. The job isn't done until you have the keys to a property that is not only beautifully restored but is also safe, structurally sound, and ready for your family to enjoy.
FAQs About Water Damage Restoration Steps
When you're dealing with the fallout from a flood or a major leak, it's normal to have questions. Here are some of the most common questions homeowners have.
1. How long does the entire restoration process take?
The timeline depends entirely on the extent of the damage. A small, contained leak in one room might take only 3-5 days. However, widespread damage affecting structural elements like subfloors and framing, especially if it requires local permits in Monterey or Santa Cruz County, can take several weeks or more. Aldridge Construction provides a transparent timeline after the initial assessment.
2. Can I clean up minor water damage myself?
While tempting, a DIY approach can be risky. The real danger is the hidden moisture that wicks into drywall, insulation, and under flooring, which can lead to structural rot and mold. For anything more than a tiny spill on a hard surface, professionals should be called. They use moisture meters and thermal cameras to ensure an area is completely dry.
3. Will my homeowner's insurance cover water damage?
In general, standard homeowner's insurance policies cover damage from "sudden and accidental" events like a burst pipe or failed appliance hose. They typically do not cover damage from gradual, neglected leaks or overland flooding (which requires a separate flood insurance policy). Aldridge Construction works directly with insurance adjusters in California and Arizona to help streamline your claim.
4. What is the difference between water mitigation and restoration?
It’s a two-part process.
- Water Mitigation: This is the emergency response phase focused on stopping further damage. It includes stopping the water source, extracting standing water, and stabilizing the property.
- Water Restoration: This is the rebuilding phase. It involves all the repairs needed to return the property to its pre-loss condition, including deep cleaning, sanitizing, and construction.
Aldridge Construction handles both phases seamlessly, which is a core part of its approach to home renovation and remodeling.
5. What does that musty smell after water damage mean?
That earthy, musty odor is a major red flag. It is a tell-tale sign of trapped moisture and almost always indicates that mold or mildew has begun to grow. If you can still smell it, the area is not truly dry. The only way to eliminate the odor for good is to remove the moisture source and apply professional antimicrobial treatments.
Facing water damage is a stressful experience, but you don’t have to manage it by yourself. The expert team at Aldridge Construction is ready to guide you through every single step, from that first frantic phone call to the final walkthrough of your beautifully restored home.
Ready to get your home back to normal? Contact Aldridge Construction today for a professional assessment and a clear path forward.