
Direct Answer: Tile and grout are not waterproof. Wet areas rely on a membrane behind the tile. When that membrane is missing or poorly sealed at seams and corners, water reaches the wall and subfloor.
Almost every bathroom call I get from Salinas homeowners starts with the tile. Loose tiles near the shower floor, grout that cracks again a month after it was patched, a brown stain spreading across the ceiling of the room below.
One homeowner described wanting to redo the countertop, tub shower area, wall tile and floor tile in a bathroom about 13 feet by 6 feet. Another wanted a full master bath with a new shower pan, fan, and flooring. Both were describing the same underlying issue without knowing it.
The tile is almost never the actual failure. The failure is the waterproofing layer hidden behind and under it, and this article explains what that layer is, what a correct one looks like, and why the inspection stage is the only outside check you get on work you will never see again.
Tile Is Not Waterproof, and Neither Is Grout
This surprises most homeowners. Porcelain and ceramic tile shed water, but the joints between them do not. Grout is a cement product, and cement absorbs water. Sealer slows that down for a while, then it wears off.
In a shower built the right way, water passes through the grout, hits a waterproof membrane bonded to the wall or floor behind the tile, and drains back out through the drain assembly. The membrane is the actual shower. The tile is the wear surface you look at.
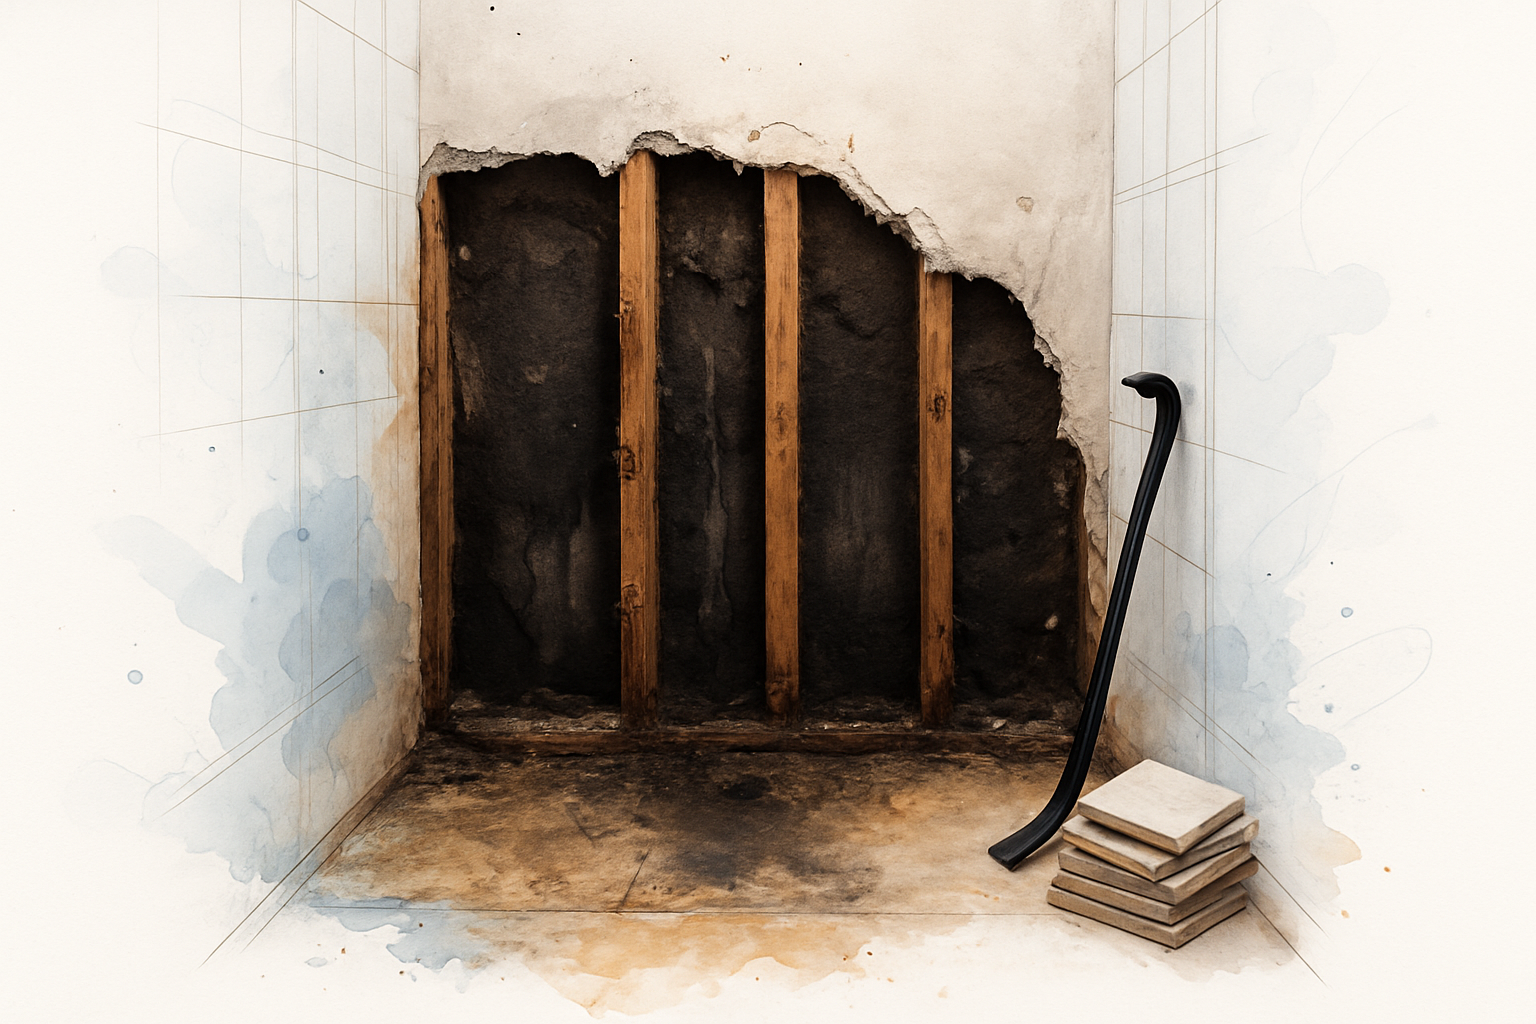
When there is no membrane, or when it is cut short at a corner or curb, water keeps going. It soaks the backer board, then the framing, then the subfloor. Common signs I see in Monterey County homes:
- Tiles that sound hollow when you tap them, usually low on the wall
- Grout lines that crack in the same vertical corner over and over
- Discolored paint or soft drywall on the other side of the shower wall
- A musty smell that returns a day after cleaning
- Springy flooring right outside the shower curb
By the time any of that shows up on the surface, the damage in the wall cavity is usually worse than the homeowner expects. That is why a bathroom update can quietly turn into a full renovation once demo starts.
What Proper Waterproofing Actually Involves
Here is what you are paying for when a wet area is built correctly. None of this is visible when the job is done, which is exactly why it gets skipped on low bids.
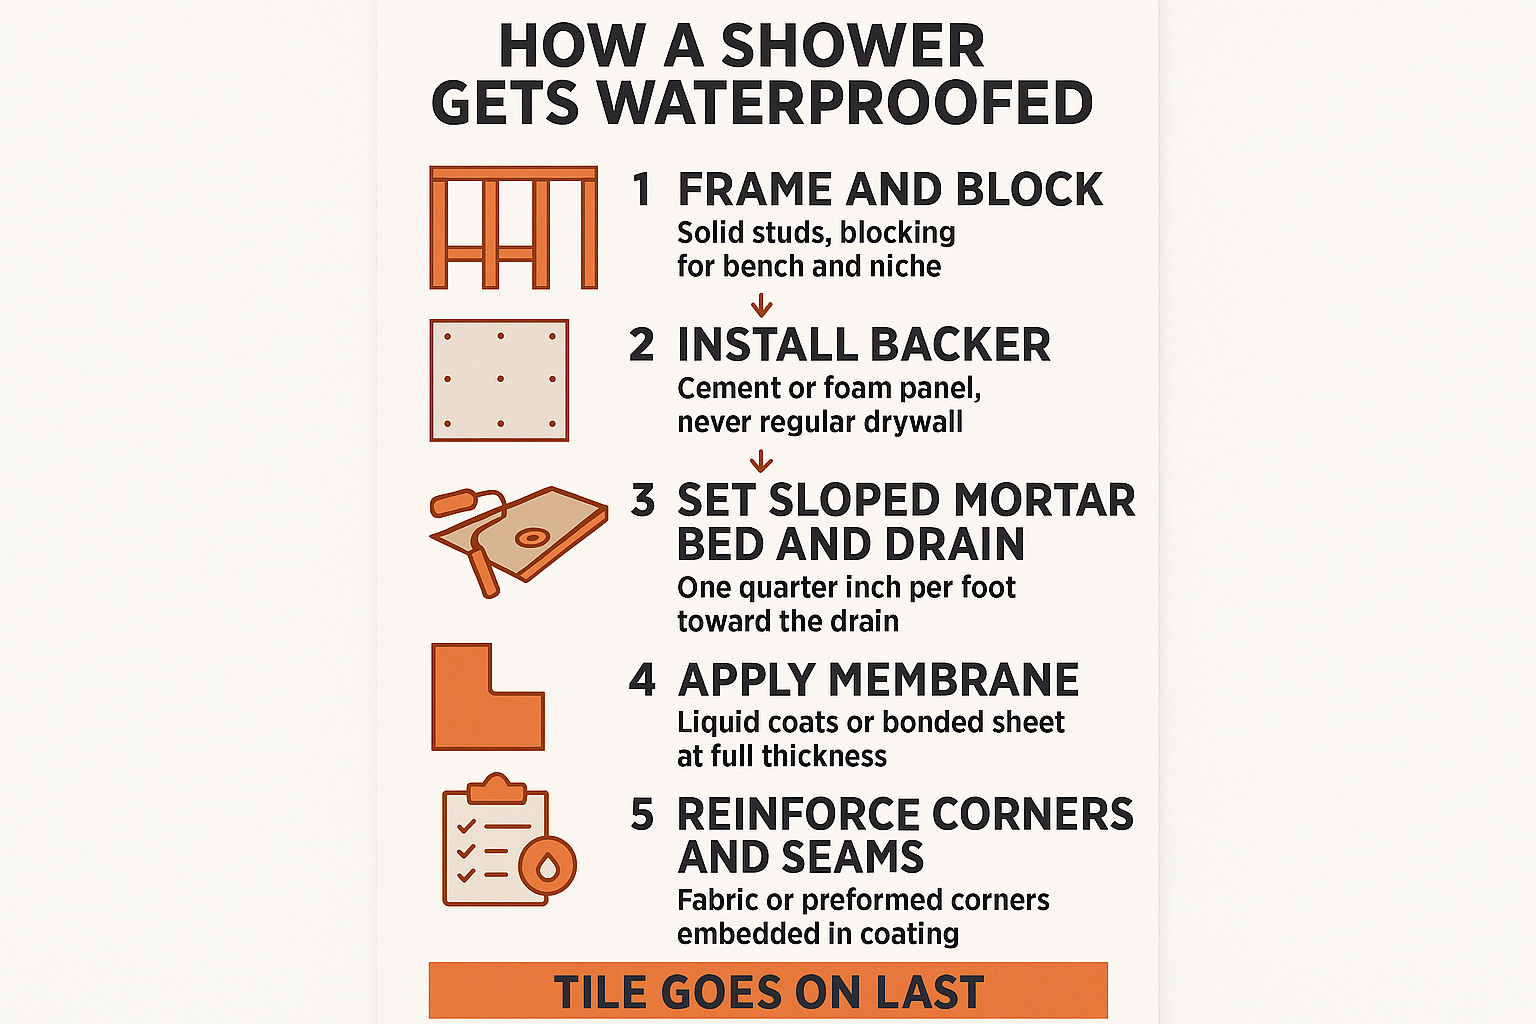
Substrate preparation. The tile goes over a backer material, not over regular drywall. Cement board or a foam backer panel gets fastened to solid, plumb framing with blocking added where a bench, niche, or grab bar will land.
Membrane application. Two common systems are a liquid applied membrane rolled or troweled on in multiple coats, and a bonded sheet membrane set in thinset. Either one has to reach the manufacturer’s specified thickness or it does not perform.
Corners and seams. These are the highest stress points in the whole assembly. Inside corners, board joints, and the curb get reinforcing fabric or preformed corner pieces embedded in the membrane, not just an extra swipe of coating.
The drain connection. The membrane has to tie into the drain body itself. On a traditional clamping ring drain, weep holes must stay open so water in the mortar bed can escape. Packed grout or thinset over those holes is a slow leak waiting to happen.
The setting bed. Tile is bonded on top of the cured membrane with the right thinset for that system. The mortar bed under a shower floor slopes about 1/4 inch per foot toward the drain so water actually moves.
A proper build also includes a flood test on shower pans, where the drain is plugged and the pan is filled and watched. It is a slow, boring step, and it is the one that proves the work before any tile goes on.
Where Shower Waterproofing Usually Fails
These are the failure points I run into most often on tear-outs in Salinas, Seaside, and Marina bathrooms.
| Failure Point | What Went Wrong Behind the Tile | What You Notice in the House |
|---|---|---|
| Inside corners | Seams not reinforced with fabric or preformed corners | Repeating vertical grout cracks, loose tile at the corner |
| Shower curb | Membrane stopped short or was cut at the ends | Damp baseboard or warped flooring just outside the shower |
| Drain connection | Membrane not tied to the drain, or weep holes packed shut | Slow drain, musty smell, staining on the ceiling below |
| Niche or bench | Top surface not sloped or not fully coated | Dark grout lines, tile popping loose off the shelf |
| Wall substrate | Green drywall used instead of backer board and membrane | Soft wall behind the tile, mildew returning after cleaning |
The Order Operations Have to Happen In
Waterproofing is a sequence. Skip a step or take them out of order and the assembly does not work, no matter how good the tile looks.
The Inspection Is the Only Outside Check You Get
California’s building code sets specific requirements for shower and wet area construction, and those requirements are enforced through inspection. On a permitted bathroom, an inspector looks at the waterproofing before tile goes up, not after.
That single visit is the only time a third party ever sees the layer that keeps water out of your walls. Once tile is set, nobody can verify it again without demolition.
When work is done without a permit, or by someone who never calls for inspection, there is no verification at all. You are trusting a stranger’s word about something you will never see. That is worth remembering when one bid comes in far under the others, since the gap often lives in the parts you cannot inspect yourself.
Permit requirements vary by jurisdiction, so verify current rules with the City of Salinas, Monterey County, Santa Cruz County, or your own local agency before you start. Code editions also change, and the 2025 California Building Standards Code took effect January 1, 2026, which affects permits pulled after that date.
What This Costs and Why the Range Is So Wide
Homeowners always ask why bathroom quotes vary so much for what looks like the same room. A good part of the spread sits in the work behind the tile.
Costs vary a lot by scope, but many Monterey County bathroom remodels land somewhere in the range of roughly $15,000 to $40,000, with a typical build window of about 2 to 5 weeks. A powder room refresh sits at the low end. A master bath with a new pan, relocated plumbing, and hidden rot repair sits well above it.
Things that move the number:
- Whether framing or subfloor under the old shower has to be rebuilt
- The membrane system specified and how much of the room it covers
- Moving the drain or supply lines instead of reusing them
- Ventilation upgrades, since a proper fan is part of controlling moisture
- Tile size and layout, which changes labor hours more than material cost
If you want the full breakdown, what actually drives bathroom remodel cost goes deeper. And before you sign anything, it helps to know how to read a remodeling estimate so you can tell whether waterproofing is a line item or an assumption.
One homeowner we did two bathrooms for called the work “meticulous.” That word gets earned under the tile, not on top of it. And the permit and inspection record on a properly done bathroom is something you hand to the next buyer along with the house.
Frequently Asked Questions About Bathroom Waterproofing and Tile Failure
Can you just replace the loose tiles instead of the whole shower?
Sometimes, but only if the membrane behind them is intact. If tiles came loose because water got behind them, patching the surface puts new tile over a wet, failing assembly. I usually pull a small section first to see what the substrate looks like before anyone promises a spot repair.
How do I know if my current shower has a waterproof membrane at all?
You often cannot tell without opening something up. Homes built before waterproofing membranes became standard practice frequently have tile over a mortar bed with a pan liner that may or may not still be sealed. Age, staining on adjacent walls, and hollow-sounding tile are the practical clues.
Does a bathroom remodel need a permit in Salinas?
If the work touches plumbing, electrical, or structure, it generally does. Swapping a vanity top is different from moving a drain or rebuilding a shower pan. Requirements vary by jurisdiction, so check with your local building department before work starts.
How long does the waterproofing stage take?
The application itself is usually a day or two, but membranes need full cure time before flood testing and tile, and the inspection has to be scheduled. It is common to lose several days here, and it is not time worth compressing.
Will I have to move out during the remodel?
Most homeowners stay in the house, especially with a second bathroom available. The dusty stretch is demo, and the noisy stretch is tile cutting. On a 2 to 5 week bathroom, the disruption is real but manageable.
Wondering What Is Behind Your Tile?
If tiles are loosening or a wall next to your shower is staining, the answer is usually behind the surface, and it is worth a look before it spreads. Aldridge Construction works with homeowners across Monterey, Santa Cruz, San Benito, and Santa Clara Counties on bathroom projects where the waterproofing gets built and inspected the right way. If you would like a walkthrough and an estimate, the team can be reached at 831-682-9788 or through aldridgeconstruction.biz.