Before a single 2×4 is cut or a foundation is poured, every great home addition starts with a clear, well-defined vision. It’s about more than just wanting "more space." A successful project requires you to dig into why you need that space and what it will do for you and your family. Getting this part right is the bedrock of a successful project.
This guide on how to plan a home addition will walk you through the essential steps, from defining your goals to preparing for construction, ensuring your investment enhances your lifestyle and home value for years to come.
Step 1: Defining Your Vision and Project Scope
The journey to an expanded home begins with some honest self-reflection. You have to move past the simple idea of adding a room and get into the nitty-gritty of what that room needs to accomplish. This is the crucial first step that will guide every single decision you make down the road.
What's the real driver here? Are you dreaming of a private primary suite with a real ensuite bathroom? Maybe your goal is a sprawling, open-concept family room where everyone can gather without feeling cramped.
For homeowners in places like Monterey or Santa Cruz Counties, an Accessory Dwelling Unit (ADU) could be the perfect solution for multi-generational living or bringing in some rental income.
Must-Haves vs. Nice-to-Haves
One of the most powerful exercises Aldridge Construction recommends is creating two lists: must-haves and nice-to-haves. This simple task forces you to prioritize and brings incredible clarity when the budget conversations start.
- Must-Haves: These are the absolute non-negotiables. For a new bedroom addition, this might be an attached bathroom and a closet. Period.
- Nice-to-Haves: These are the features you’d love but could part with if the numbers get tight. Think a walk-in closet with custom shelving or those luxurious heated floors.
A well-defined scope is your project's North Star. It guides your design, informs your budget, and ensures the final space truly solves the problem that initiated the project in the first place.
It's also smart to think about your family’s needs five or even ten years from now. This long-term vision ensures your investment pays off for years to come. That ground-floor addition? It can be a playroom today and an accessible in-law suite tomorrow.
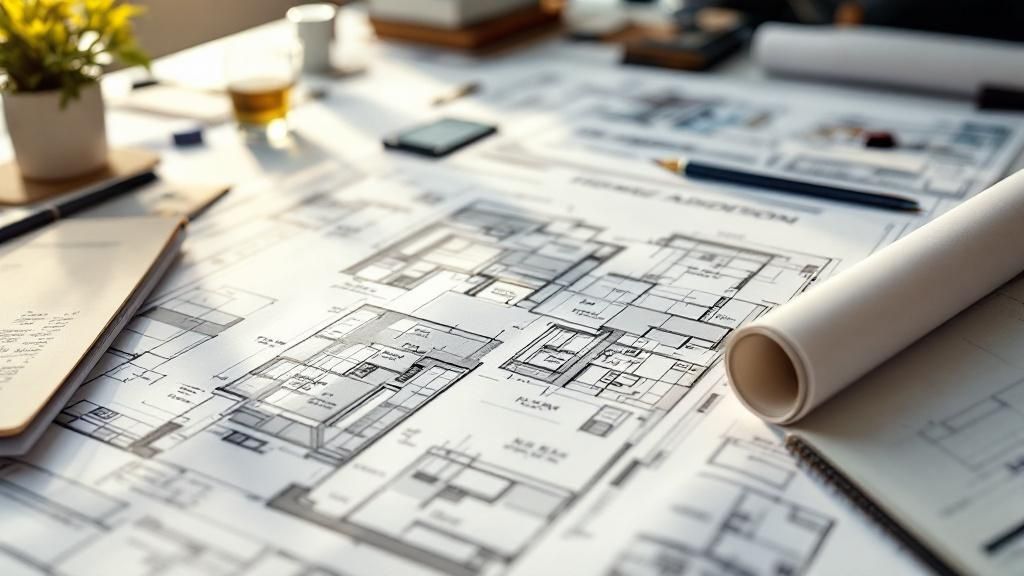
The image below shows how this initial planning directly connects to your budget.

As you can see, a clear scope is what allows for accurate cost estimation. That, in turn, dictates how you can realistically divide your funds between labor, materials, and all the other expenses that pop up.
To help you get started, here's a quick checklist to walk through the initial questions.
Initial Home Addition Planning Checklist
This table is designed to get your thoughts organized. Just thinking through these key questions can provide a huge amount of clarity before you even speak to a contractor.
| Planning Area | Key Question to Answer | Example (Family Room Addition) |
|---|---|---|
| Primary Goal | What is the main problem this addition solves? | We need a dedicated space for family movie nights and entertaining guests. |
| Key Functions | What activities will happen in this new space? | Watching TV, kids' playtime, hosting small gatherings, a reading nook. |
| Must-Have Features | What elements are absolutely non-negotiable? | Large windows for natural light, built-in storage for toys/media. |
| Nice-to-Have Features | What would be great if the budget allows? | A wet bar, a fireplace, vaulted ceilings, integrated surround sound. |
| Connections | How should it connect to the existing house? | Needs seamless flow from the kitchen and easy access to the backyard. |
| Future Use | How might we use this space in 10 years? | Could become a main-floor living area if mobility becomes an issue. |
Answering these questions honestly provides a solid foundation for your project, ensuring the final result is a space that truly works for you.
Local Factors Shape Your Plans
Your grand vision also has to mesh with local realities. Here in Monterey County, for example, things like lot size restrictions or coastal regulations can heavily influence the maximum footprint of your addition. Over in Maricopa County, Arizona, there are specific setback rules that dictate exactly how close you can build to your property lines.
Understanding these local constraints from day one is absolutely essential. Whether you’re planning a major expansion or a more focused project, Aldridge Construction's home renovation and remodeling services are built on navigating these exact local nuances to bring your vision to life.
Step 2: Creating a Realistic Home Addition Budget
Any successful home addition stands on two foundations: the literal concrete one and a rock-solid financial one. If you're serious about planning an addition, you have to move beyond simple cost-per-square-foot guesswork. A proper budget accounts for everything from the first napkin sketch to the final coat of paint.
This kind of detailed financial planning is more important than ever. The U.S. home improvement market was valued at an estimated USD 386.30 billion in 2023 and is expected to grow, telling us homeowners are tackling major projects [Precedence Research, 2024]. Smart budgeting is what separates a dream-come-true from a financial nightmare.
Breaking Down the Core Costs
Your total investment is so much more than just lumber and labor. Homeowners often get sticker shock because they forgot to account for all the "in-between" expenses.
A truly realistic budget anticipates this wider range of costs:
- Design & Engineering Fees: This covers your architect or designer's blueprints and the structural engineer who ensures the new structure is safe and sound.
- Permit & Inspection Fees: Your local city or county—whether it's Santa Cruz County, CA, or Maricopa County, AZ—charges fees for building permits and the necessary inspections.
- Materials & Finishes: This is a huge chunk of your budget. It covers everything from framing lumber and concrete to the specific choices you make for roofing, windows, flooring, and fixtures.
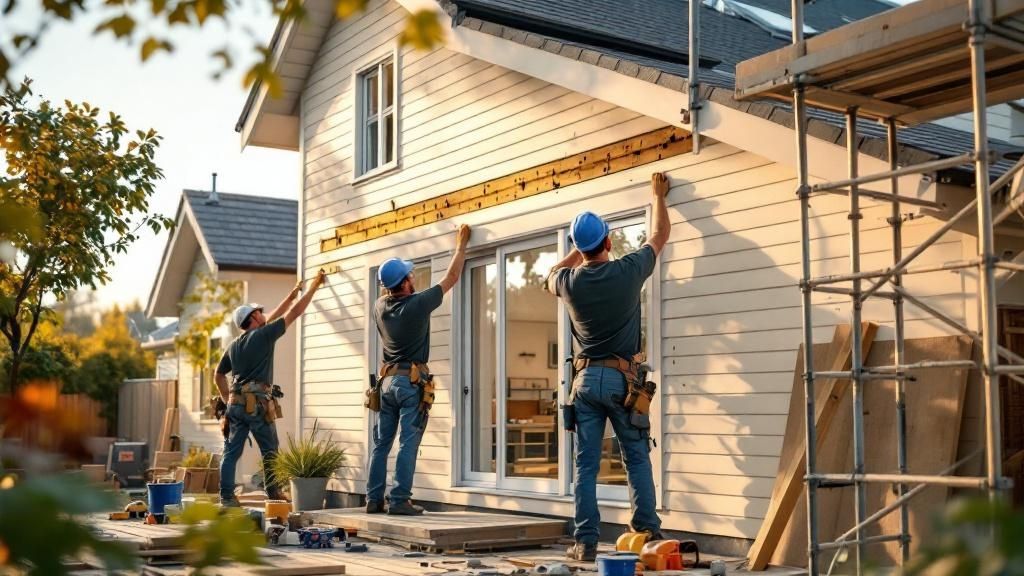
- Labor & Construction: This is the cost for your general contractor and their entire crew of skilled tradespeople—plumbers, electricians, painters, and everyone else needed to get the job done right.
- Site Prep & Landscaping: This can include excavation, pouring the foundation, and, just as importantly, fixing up your yard after the heavy equipment leaves.
To get a feel for how these numbers might look for your project, our home addition costs calculator can give you a solid preliminary estimate.
The Non-Negotiable Contingency Fund
No matter how perfectly you plan, surprises happen. It's just the nature of construction, especially when you're tying into an older home. That’s why a contingency fund of 15-20% of your total budget isn't just a good idea—it's absolutely essential.
Think of this fund as your project's financial safety net. It’s there for when you open up a wall and discover hidden rot, or realize your old electrical panel can't handle the load of the new space. Without it, a small hiccup can throw your entire project off track.
How Material Choices Drive Your Budget
The materials you choose have a massive impact on both your initial cost and the long-term value of your addition. This is especially true here in California, where energy efficiency standards like Title 24 are a big deal.
For instance, you could go with standard vinyl windows to save money upfront. But investing in high-performance, energy-efficient Milgard windows doesn't just help you meet Title 24; it also means lower energy bills and a more comfortable home for years to come.
The same logic applies everywhere. Choosing durable quartz countertops over laminate might cost more initially, but it can seriously boost your home's resale value.
Sample Home Addition Budget Breakdown
To make this less abstract, let’s break down where the money typically goes in a mid-range home addition. While every project is different, the percentages tend to fall into a predictable pattern. Here is a sample breakdown to help you visualize the allocation:
| Expense Category | Estimated % of Total Budget | Key Considerations |
|---|---|---|
| Design & Permitting | 5% – 15% | Includes architect/designer fees, structural engineering, and municipal permit costs. Varies by complexity. |
| Site Work & Foundation | 10% – 15% | Covers excavation, grading, and concrete for the foundation. Costs can rise with difficult site access. |
| Framing & Exterior | 15% – 25% | Lumber, sheathing, roofing, siding, and windows. This forms the "shell" of your addition. |
| Major Systems (HVAC, Electrical, Plumbing) | 10% – 15% | Tying into existing systems can be complex. May require panel upgrades or new HVAC units. |
| Interior Finishes | 20% – 30% | Drywall, paint, flooring, trim, doors, lighting, and cabinetry. This is where your personal style shows. |
| Labor Costs | 20% – 40% | Often overlaps other categories. This is the cost of the general contractor and all skilled subcontractors. |
| Contingency Fund | 15% – 20% | A non-negotiable fund for unforeseen issues like hidden structural problems or material price increases. |
This table illustrates that the visible finishes are just one piece of a much larger financial puzzle. Smart budgeting means accounting for all of it.
Financing Your Home Addition
Very few homeowners pay for a major addition with cash. Luckily, you’ve got several solid financing options to explore, each with its own pros and cons.
- Home Equity Loan: You get a single lump-sum payment at a fixed interest rate. This is great if you want predictable, stable monthly payments.
- Home Equity Line of Credit (HELOC): This functions more like a credit card secured by your home. You can draw funds as you need them, which offers great flexibility, but the interest rate is often variable.
- Cash-Out Refinance: With this option, you get a brand-new mortgage for more than you currently owe and take the difference in cash. It's a fantastic choice if you can lock in a lower interest rate than your current one.
Your best move is to sit down with a financial advisor to go over these options. They can help you figure out the smartest path for your financial situation, making sure your dream addition is built on a foundation you can afford.
Step 3: Navigating Design Plans and Building Permits
You’ve set your goals and figured out a realistic budget. Now for the exciting part: turning that idea for a home addition into something real. This is where your vision starts to take shape on paper, but it’s also where you need to get the official green light to start building. Getting this phase right is absolutely critical if you want to avoid expensive delays down the road.

This process really breaks down into two key pieces: developing the detailed architectural designs and then wrestling with the local building permit process. Each one demands a different skill set and a solid grasp of local rules.
Assembling Your Professional Design Team
Bringing an addition to life isn't a one-person job; it takes a team of professionals. While a design-build firm like Aldridge Construction typically handles all of this for you, it’s good to know who does what.
- Architect or Designer: This is your creative lead. They take your wish list and ideas and translate them into initial sketches and, eventually, full-blown construction blueprints. Their world is all about aesthetics, flow, and how you’ll actually use the space.
- Structural Engineer: This is the expert who makes sure your new addition is safe, solid, and meets all the structural codes. They’re the ones doing the math on load requirements, figuring out the foundation, and designing the bones of the structure.
These two roles are completely different but work hand-in-hand. The architect designs how the space will look and feel, while the engineer makes sure it will be standing strong for decades.
From Concept Sketch to Construction Blueprints
The design process is a journey. It always starts with rough sketches, where different layouts or ways the addition connects to your home are explored. This is a very collaborative back-and-forth, where your feedback helps zero in on the perfect design for your family.
Once everyone’s on board with a concept, it gets developed into detailed construction blueprints. These are the official documents your contractor will build from, and they contain everything.
Think of construction blueprints as the master instruction manual for your home addition. They leave no room for guesswork, detailing everything from wall dimensions and window placements to the specific locations of electrical outlets and plumbing lines.
Having a complete, thorough set of plans is the single best way to get accurate bids from contractors and prevent costly mistakes or miscommunications once the hammers start swinging.
Mastering the Local Permit Process
Let’s be honest: getting a building permit can be the most frustrating part of planning a home addition. This is one area where a local contractor who knows the ropes is worth their weight in gold.
Whether you're in Monterey, Santa Cruz, or San Benito Counties here in California, or even over in Maricopa County, Arizona, every single building department has its own quirks—its own submission process, review timelines, and fee structures. Trying to tackle this alone often leads to major delays from simple mistakes like an incomplete application.
An experienced partner like Aldridge Construction knows the common traps and can help you put together a permit package that gets it right the first time.
Understanding Key Regulations and Codes
Your plans have to follow a whole web of regulations. These aren't just suggestions; they are legal requirements designed to ensure safety, energy efficiency, and that the project fits within local land use rules.
Here are the big ones:
- Zoning Laws: These rules control what you can build and where. They cover things like property line setbacks (how far your addition has to be from your property line), lot coverage limits, and height restrictions.
- Building Codes: These are the nitty-gritty technical standards for safety and quality. They cover everything from the lumber used for framing to the type of electrical wiring and plumbing required.
- Energy Codes: In California, Title 24 is a big deal. It sets tough standards for energy efficiency, meaning your addition will need things like high-performance windows and specific levels of insulation. Arizona has similar codes focused on keeping homes cool efficiently.
If you submit a plan that ignores any of these codes, it’s getting rejected. Period. That sends you right back to the drawing board and can stall your project for months. This is exactly why professional plan preparation isn’t just a good idea—it’s essential to keeping your project on schedule.
Step 4: How to Select the Right Design-Build Contractor
Picking your contractor is easily the most critical decision you'll make when adding on to your home. This is the partner who will take your expensive blueprints and turn them into a physical reality. Finding a qualified, trustworthy team is everything.
The right choice leads to a smooth process and a beautiful result. The wrong one can be a nightmare of budget overruns, endless delays, and unnecessary stress. The type of building partner you choose fundamentally shapes the entire project.
Design-Build Versus Traditional Contracting
In the old-school, traditional approach, you're juggling two separate contracts: one for your designer and one for your builder. This often creates a communication gap. An architect’s grand vision might not line up with the practical, on-the-ground realities of construction, leading to frustrating conflicts or expensive changes.
A design-build firm, like Aldridge Construction, brings the design and construction teams together under one roof. This creates a single point of accountability for your entire project, from the first sketch to the final coat of paint.
With a design-build team, the architect, designer, and builders are all collaborating from day one. This synergy ensures the design is not only beautiful but actually buildable within your budget. It’s the best way to prevent the common “sticker shock” that happens when an independent architectural plan turns out to be way too expensive to construct.
Vetting Potential Building Partners
Solid, upfront research is your best defense against hiring the wrong contractor. Before you even pick up the phone, a little homework will help you build a shortlist of qualified candidates. This initial screening is absolutely crucial.
Start by checking their credentials. In California, you should always verify a contractor’s license status and insurance on the Contractors State License Board (CSLB) website. For projects in Arizona, the equivalent is the Arizona Registrar of Contractors (ROC). A valid license and active insurance—both general liability and workers' compensation—are completely non-negotiable.
Next, it’s time to dig into their reputation.
- Check online reviews on sites like Google, Yelp, and Houzz, but learn to read between the lines.
- Ask for a list of recent client references, and make sure they’re for addition projects similar to yours. Actually call them!
- Request to see a full portfolio of their completed work. Pay close attention to projects that match your home's style and the scope of what you want to do.
For those on the Central Coast, finding a home renovation and ADU contractor in Monterey with a deep portfolio of local work is a huge plus. They’ll be completely dialed in on the regional styles, building codes, and permitting quirks.
Key Questions to Ask During Interviews
Once you’ve got your shortlist, it’s interview time. This is your chance to get a feel for their professionalism, communication style, and real-world expertise. You’re hiring them for a major role, so treat it like a job interview.
Show up prepared with targeted questions:
- Experience: How many home additions have you completed in the last two years? Can you show me examples of projects with a similar scope and style?
- Team & Subs: Do you use your own employees or a regular crew of subcontractors? Are all your subs licensed and insured?
- Project Management: Who is my main point of contact once construction starts? How often will we have progress meetings?
- Timeline & Scheduling: What’s your gut-level timeline for a project like mine? How do you handle delays from things like weather or supply chain issues?
- Change Orders: What’s your process when I want to change something after we've started? How are the costs for those changes calculated and approved?
- Payment Schedule: What does your payment schedule look like? (Hint: It should be tied to project milestones, not random dates on a calendar).
Pay attention not just to what they say, but how they say it. A real pro will answer these questions clearly and confidently.
Analyzing and Comparing Bids
After the interviews, you'll start getting detailed bids. It's a classic mistake to just grab the one with the lowest price. A suspiciously cheap bid is often a red flag—it could mean they're cutting corners, using shoddy materials, or just didn't understand the project scope. All of that leads to expensive change orders later on.
Instead, lay the bids out side-by-side and compare them line by line. A quality bid is incredibly detailed, spelling out the exact materials—right down to the brand of windows or type of insulation. If one bid is way lower than the others, find out why.
Your goal isn't to find the lowest price. It's to find the best value.
Step 5: Finalizing Plans and Preparing for Construction
With your design-build partner on board, you're at the final checkpoint before construction kicks off. This is where we lock in the last details, sign the official documents, and get your home ready for the temporary (but exciting) disruption. Getting this stage right is a huge part of keeping the project running smoothly and keeping your stress levels low.
This is the point where your addition stops being a collection of ideas and drawings and starts becoming a concrete plan of action. A great outcome is built on the clarity we establish right here, before a single hammer swings.
Reviewing Your Construction Contract
Before any work begins, you will review the construction contract. Think of this document as your project's most important safeguard, so you’ll want to review it with a fine-tooth comb. A solid contract from a trustworthy builder should be transparent and thorough, leaving absolutely nothing to chance.
Never feel pressured to sign a contract that feels vague or incomplete. It should spell out every single detail of the project.
Here’s what you should see clearly defined:
- Detailed Scope of Work: The contract needs to list every task, from breaking ground to the final coat of paint. It should specify materials right down to the model numbers for windows and the brand of shingles for the roof.
- Clear Payment Schedule: Payments should be tied to tangible, verifiable project milestones—like the foundation being poured or framing passing inspection—not just dates on a calendar.
- Defined Change Order Process: Life happens, and sometimes plans change. The contract must explain exactly how those changes will be handled: how they’re requested, priced out, approved in writing, and paid for.
- Project Timeline: It should provide an estimated start and completion date, while also acknowledging that things like weather can cause adjustments.
Understanding the Project Schedule
Once the ink on the contract is dry, your contractor will lay out a detailed project schedule. This isn't just a simple calendar; it's a carefully orchestrated roadmap that coordinates every trade—plumbers, electricians, framers—to ensure they’re on-site exactly when they need to be.
This schedule helps you see the project's flow and know what to expect week by week. Key milestones to watch for usually include pouring the foundation, completing the framing, and reaching "close-in" (when windows and doors are installed, making the structure weathertight).
The Aldridge Construction team makes it a priority to create a clear, easy-to-follow schedule for all our home additions and remodeling projects, so you're never left in the dark.
A project schedule is the heartbeat of the construction process. It synchronizes every trade, material delivery, and inspection, turning a complex sequence of events into an orderly and efficient workflow.
Preparing Your Home for Disruption
Let’s be honest: living through a renovation takes some planning. A good contractor will work with you to contain the mess, but a little prep work on your end can make a world of difference. It’s a practical step that often gets overlooked in the excitement.
Here are a few tips from our experience:
- Create Dust Barriers: Even with the best containment, fine dust has a way of traveling. Use plastic sheeting and painter's tape to seal off doorways to adjoining rooms. Don't forget to cover air vents nearby to keep dust out of your HVAC system.
- Protect Furniture and Valuables: Move all furniture, artwork, and heirlooms out of the construction zone and any adjacent areas. If something can't be moved, cover it securely with thick plastic or old blankets.
- Establish Clear Communication: Set up a regular check-in time with your project manager. Whether it's a quick chat every morning or a detailed email on Fridays, consistent communication is the best way to prevent misunderstandings.
- Plan for Utility Shutoffs: At certain points, your contractor will need to temporarily shut off water, electricity, or gas. They should always give you a heads-up so you can plan around it—like doing laundry or cooking meals in advance.
This kind of proactive thinking is essential to ensure your major investment is a smart and successful one.
Frequently Asked Questions About Home Additions
When you're thinking about a home addition, questions are a good thing. They mean you’re taking the process seriously. To help you feel more confident as you get started, we’ve put together some straight-talk answers to the most common questions we hear from homeowners in Monterey County, CA, and Maricopa County, AZ.
1. How long does it take to plan a home addition?
Before a single hammer swings, there's the planning phase. This crucial pre-construction period can take anywhere from 3 to 12 months. A well-laid plan is the single best predictor of a smooth construction process.
Here's a realistic look at how that time is spent:
- Defining Your Vision & Budget (1-3 months): Nailing down goals, "must-haves," and securing financing.
- Architectural Design (2-4 months): Turning ideas into detailed, buildable blueprints.
- Permitting (2-6+ months): Submitting plans and waiting for approval from the local building department in places like Santa Cruz or Monterey.
Partnering with a skilled design-build firm like Aldridge Construction can often streamline this process by managing design, engineering, and permitting under one roof.
2. What is the average cost per square foot for an addition?
This is probably the first question everyone asks, but "cost per square foot" can be a very misleading number. In places like California's Central Coast or Arizona's Maricopa County, you might see baseline figures in the $400-$600 per square foot range for a basic addition.
However, adding a kitchen or bathroom can easily climb to $800-$1,000+ per square foot. The final price is driven by real-world factors: the complexity of tying into the existing roofline, foundation needs, and your choice of finishes like custom cabinetry versus builder-grade options. That's why a detailed, itemized quote is infinitely more reliable than a guesstimate.
3. Can I live in my house during an addition?
Yes, you often can, but it demands careful planning and patience. The answer depends on the scope of your project. If you’re building a self-contained addition off the back of the house with a separate entrance, living at home is usually manageable.
However, if your project is a second-story addition or a major kitchen expansion that tears open the heart of your home, staying put might be impractical or unsafe. A professional contractor will work with you to create a solid containment plan, establish clear work zones, and schedule utility shutoffs far in advance.
4. What adds the most value in a home addition?
The additions that deliver the best return on investment (ROI) are those that boost your home’s core functionality and meet the needs of today's buyers. According to the Remodeling Cost vs. Value Report, projects like a new primary suite with a full ensuite bathroom or a significant kitchen expansion are top performers.
The real key to maximizing value is seamless integration. An addition that looks and feels like it was always part of the original house will always be more valuable. In California, incorporating energy-efficient features that meet Title 24 standards—like high-performance windows and better insulation—also adds significant long-term value.
5. What are the most common home addition mistakes to avoid?
The most common mistakes are all completely avoidable with a little foresight. The single biggest error is setting an unrealistic budget without a healthy contingency fund of 15-20%.
Other common pitfalls include:
- Failing to thoroughly vet your contractor (always check licenses, insurance, and references).
- Making frequent design changes after construction has started, which triggers expensive delays.
- Underestimating the complexity of your local permitting process.
Working with a professional design-build firm that guides you through a proven process is the best way to sidestep these common issues.
Are you ready to stop dreaming and start planning your home addition? The team at Aldridge Construction has the local expertise and commitment to quality to bring your vision to life in Monterey, Santa Cruz, San Benito, or Maricopa Counties. Contact us today for a professional consultation.