Your home's frame is its skeleton. It's the hidden structure that holds up everything, from the roof over your head to the floor under your feet. When the framing is done right, your home will be strong and safe for many years. But if it's done wrong, you could face expensive problems like sagging floors and cracked walls.
This is why a framing inspection is one of the most important steps in any new home build, addition, or big remodel in areas like Monterey or Maricopa County. You don't have to be an expert, but you should know what to look for. This framing inspection checklist: pro tips every homeowner needs will show you how. Made by the experienced team at Aldridge Construction, this guide points out key things that are often missed.
We'll explain how to spot signs of water damage, check for correct nailing, and make sure the structure is properly braced. Understanding the crucial role of substructures in building construction is the first step to knowing why your home's skeleton is so important. With these pro tips, you'll feel more confident and ensure your project is built with quality from the start.
1. Check for Water Damage and Rot
Before you check anything else on your framing inspection checklist, look for water damage. Moisture is the biggest enemy of a wood frame. It can lead to rot, mold, and a serious loss of strength. Finding these issues early can save you from a huge disaster later.
Why It's a Critical First Step
Wood that is damaged by water can't support the weight it was meant to. Rotting wood in floor joists or wall studs can cause floors to sag and drywall to crack. In areas near the coast, like Monterey and Santa Cruz Counties, the damp, salty air can make wood rot even faster. To learn more about how water affects homes, you can read these detailed explanations of water damage.
Actionable Inspection Tips
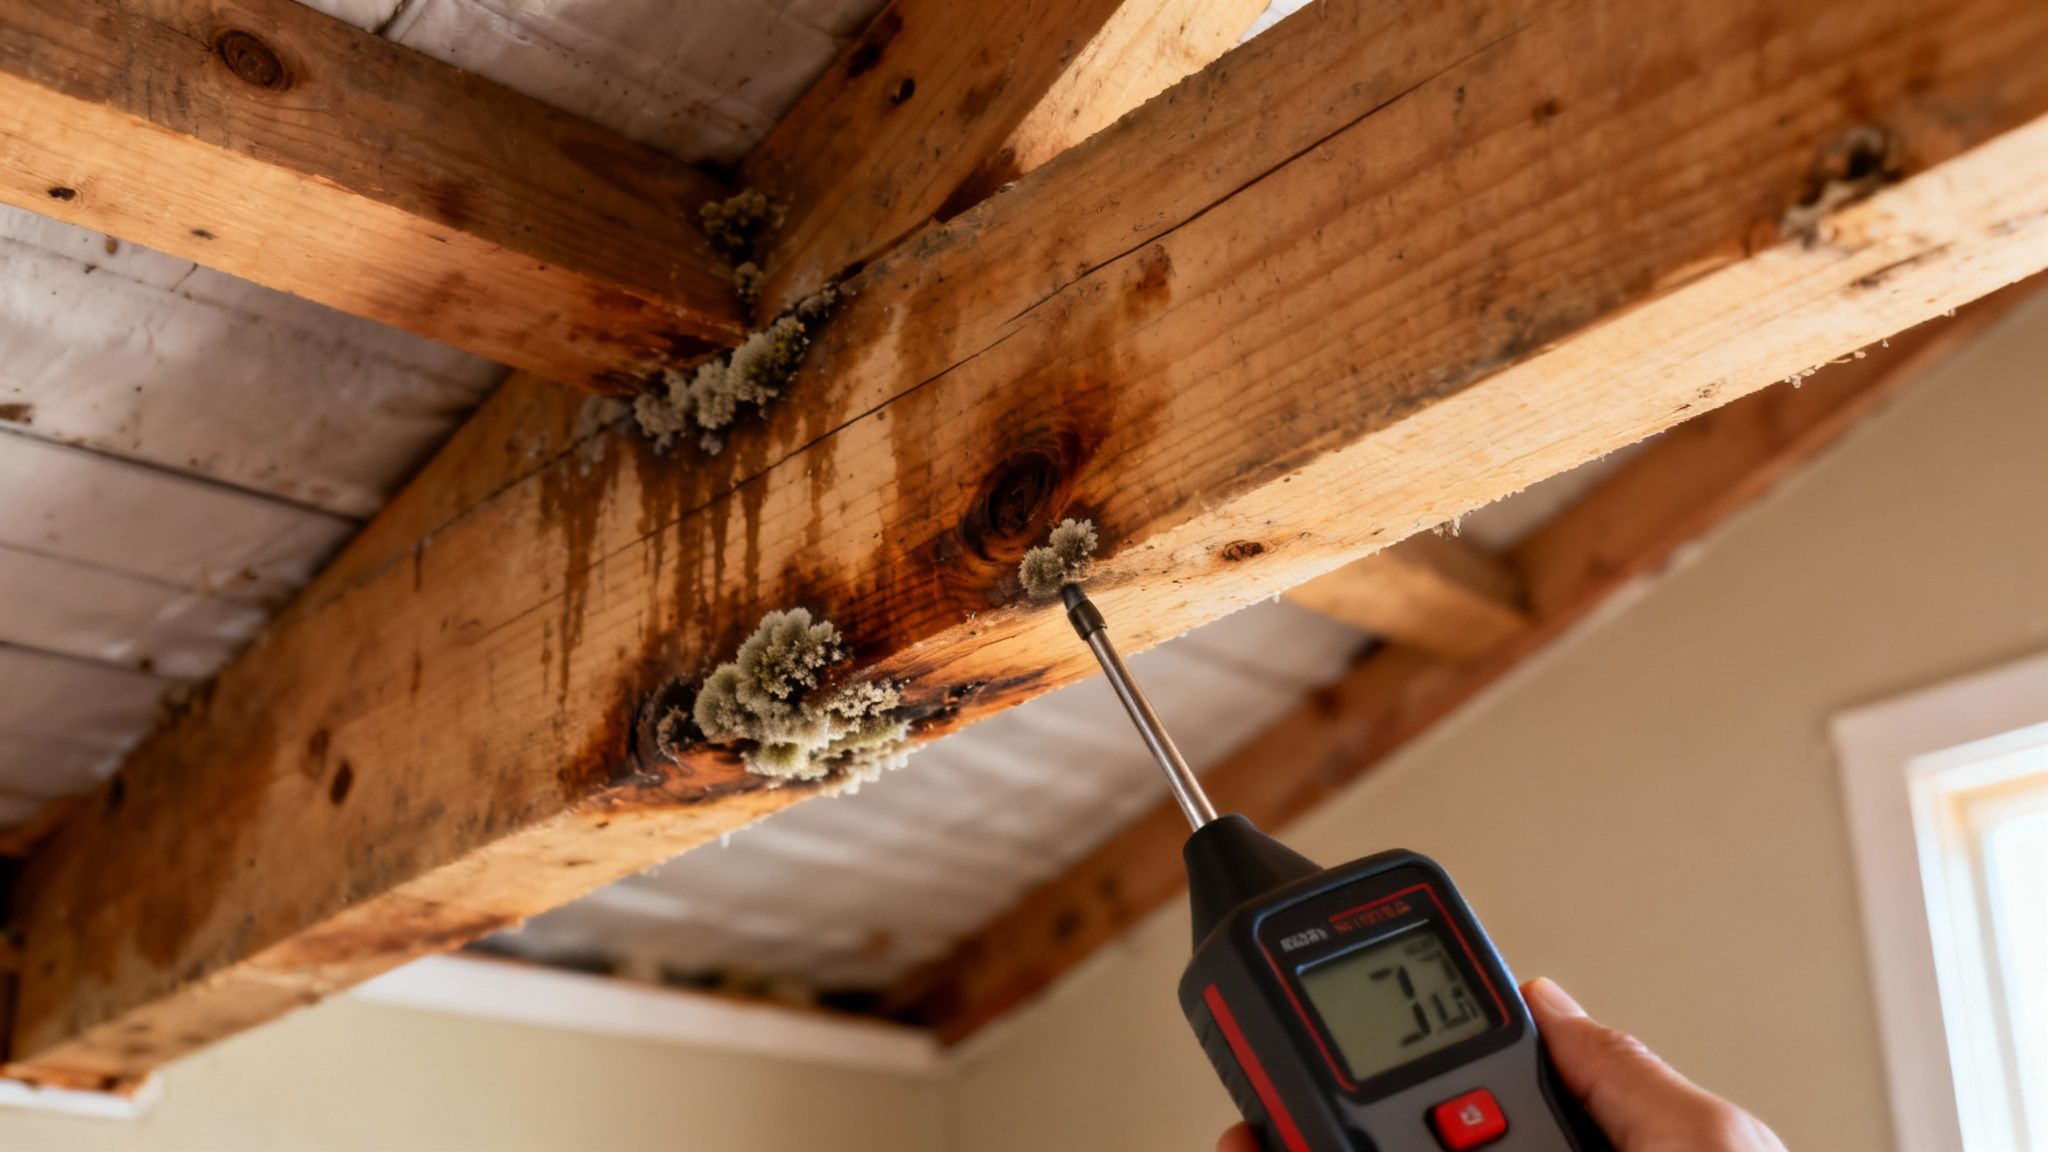
To check your framing, you need to get hands-on. Look for dark spots, stains, or any fuzzy white or black stuff that could be mold.
- The Screwdriver Test: Gently push the tip of a screwdriver into any wood you think might be damaged. Healthy wood will be hard and firm. If the wood feels soft or spongy, it's a clear sign of rot.
- Use a Moisture Meter: This tool gives you an exact reading of how much moisture is in the wood. A reading over 20% is a warning sign that the wood could start to decay.
- Focus on Vulnerable Areas: Pay close attention to the wood that sits on the foundation, the framing around windows and doors, and any wood under bathrooms or kitchens.
Pro Tip: The best time to look for moisture is right after a heavy rain. This helps you find active leaks that you might not see when the wood is dry. This is a key step in Aldridge Construction's process to ensure a solid structure. Unchecked moisture can cause major problems, similar to what's seen in homes that need a full resource on restoration processes.
2. Verify Proper Nailing and Connection Methods
A wood frame is a system where every piece works together. The nails, screws, and metal connectors are what hold it all together. Checking that the right fasteners are used correctly ensures the frame can stand up to gravity, wind, and even earthquakes.

Why It's a Critical Structural Check
Using the wrong nails or not spacing them correctly is a common and dangerous shortcut. It can make a home much weaker. This part of a framing inspection checklist makes sure your home is built to code and ready for the weather in California or Arizona.
Actionable Inspection Tips
You don't need to be an engineer to see problems with fasteners. A quick visual check can tell you a lot.
- Look for Proper Hardware: Make sure you see metal connectors like hurricane ties and joist hangers where the roof meets the walls and floors meet walls. If they are missing, it's a big problem.
- Inspect Fastener Patterns: Nails and screws should be straight and spaced correctly according to the building plans. Look for "shiners" (nails that missed the wood stud) or nails that are driven in too deep, which can damage the wood.
- Check for Full Nailing: Metal connectors like joist hangers have many holes for a reason. Make sure every hole has the right nail or screw in it. A partially nailed connector is a weak connector.
Pro Tip: Carry a small magnet with you during your inspection. It can help you find hidden metal plates and straps. Take pictures of any connections that look wrong to show your builder. The easiest way to get this right is to learn how to find a good contractor from the start.
3. Assess Structural Cracks and Wood Splitting
Not all cracks in wood are a problem. Some small cracks are normal as wood dries out. But other cracks can be a sign of serious stress on your home's frame. Knowing the difference is a key part of your framing inspection checklist.
Why It's a Critical First Step
Ignoring large cracks can lead to bigger structural issues. A split in a beam that holds up your floor could be a sign that it's carrying too much weight. This could cause your floors or roof to sag. In places like San Benito County, cracks could also mean the foundation is settling.
Actionable Inspection Tips
Look at cracks carefully to see how serious they are. You are looking for patterns that tell a story.
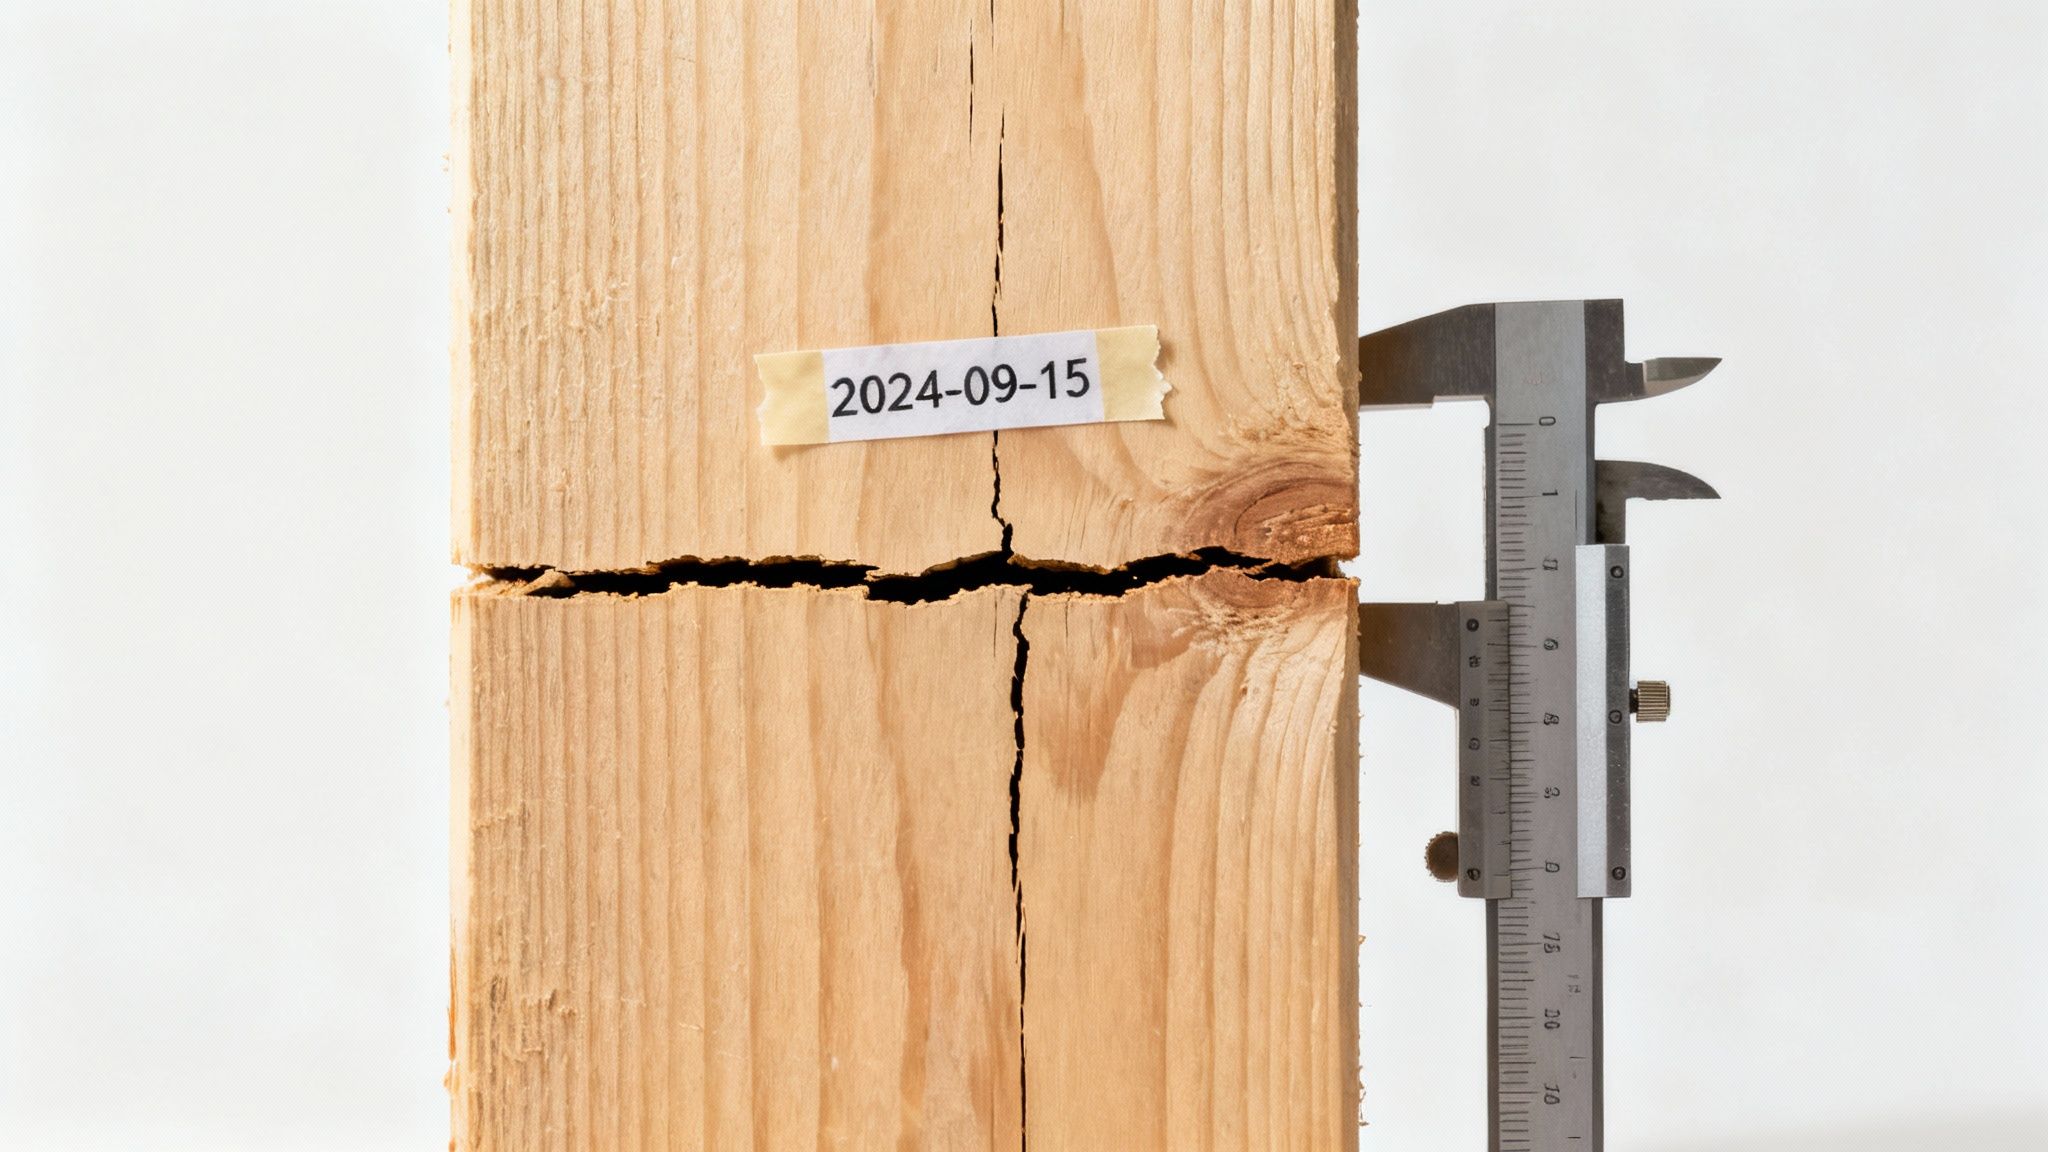
- Document and Monitor: Put a piece of tape over a crack and mark the ends and the date. Check it later to see if the crack is getting bigger. If it is, that's a sign of an active problem.
- Measure the Width: Small, hairline cracks are usually fine. But if a crack is wide enough to fit a coin into, you should have a professional look at it.
- Check for Corresponding Cracks: Look at both sides of the wood beam or stud. A crack that goes all the way through is much more serious than one that is just on the surface.
- Note the Direction: Pay close attention to how the crack is running. Horizontal cracks in beams are a major red flag. They go against the wood grain and make the wood much weaker.
Pro Tip: Take clear photos of any big cracks you find. Put a coin or ruler next to the crack to show its size. This is very helpful when you talk to a structural engineer or a trusted builder like Aldridge Construction.
4. Evaluate Beam and Joist Sagging or Deflection
The horizontal wood pieces in your home, like beams and joists, can start to bend or sag over time. This is called deflection. It means the frame might be carrying too much weight or wasn't built strong enough. Spotting this is a key part of any framing inspection checklist.
Why It's a Critical Check
A sagging floor is not just ugly; it's a sign that your home's frame is stressed. This can happen if a wall was removed during a remodel without adding proper support. In parts of Arizona with heavy winter snow, checking for sagging is even more important.
Actionable Inspection Tips
You can spot the first signs of sagging without special tools. A few simple checks can tell you a lot.
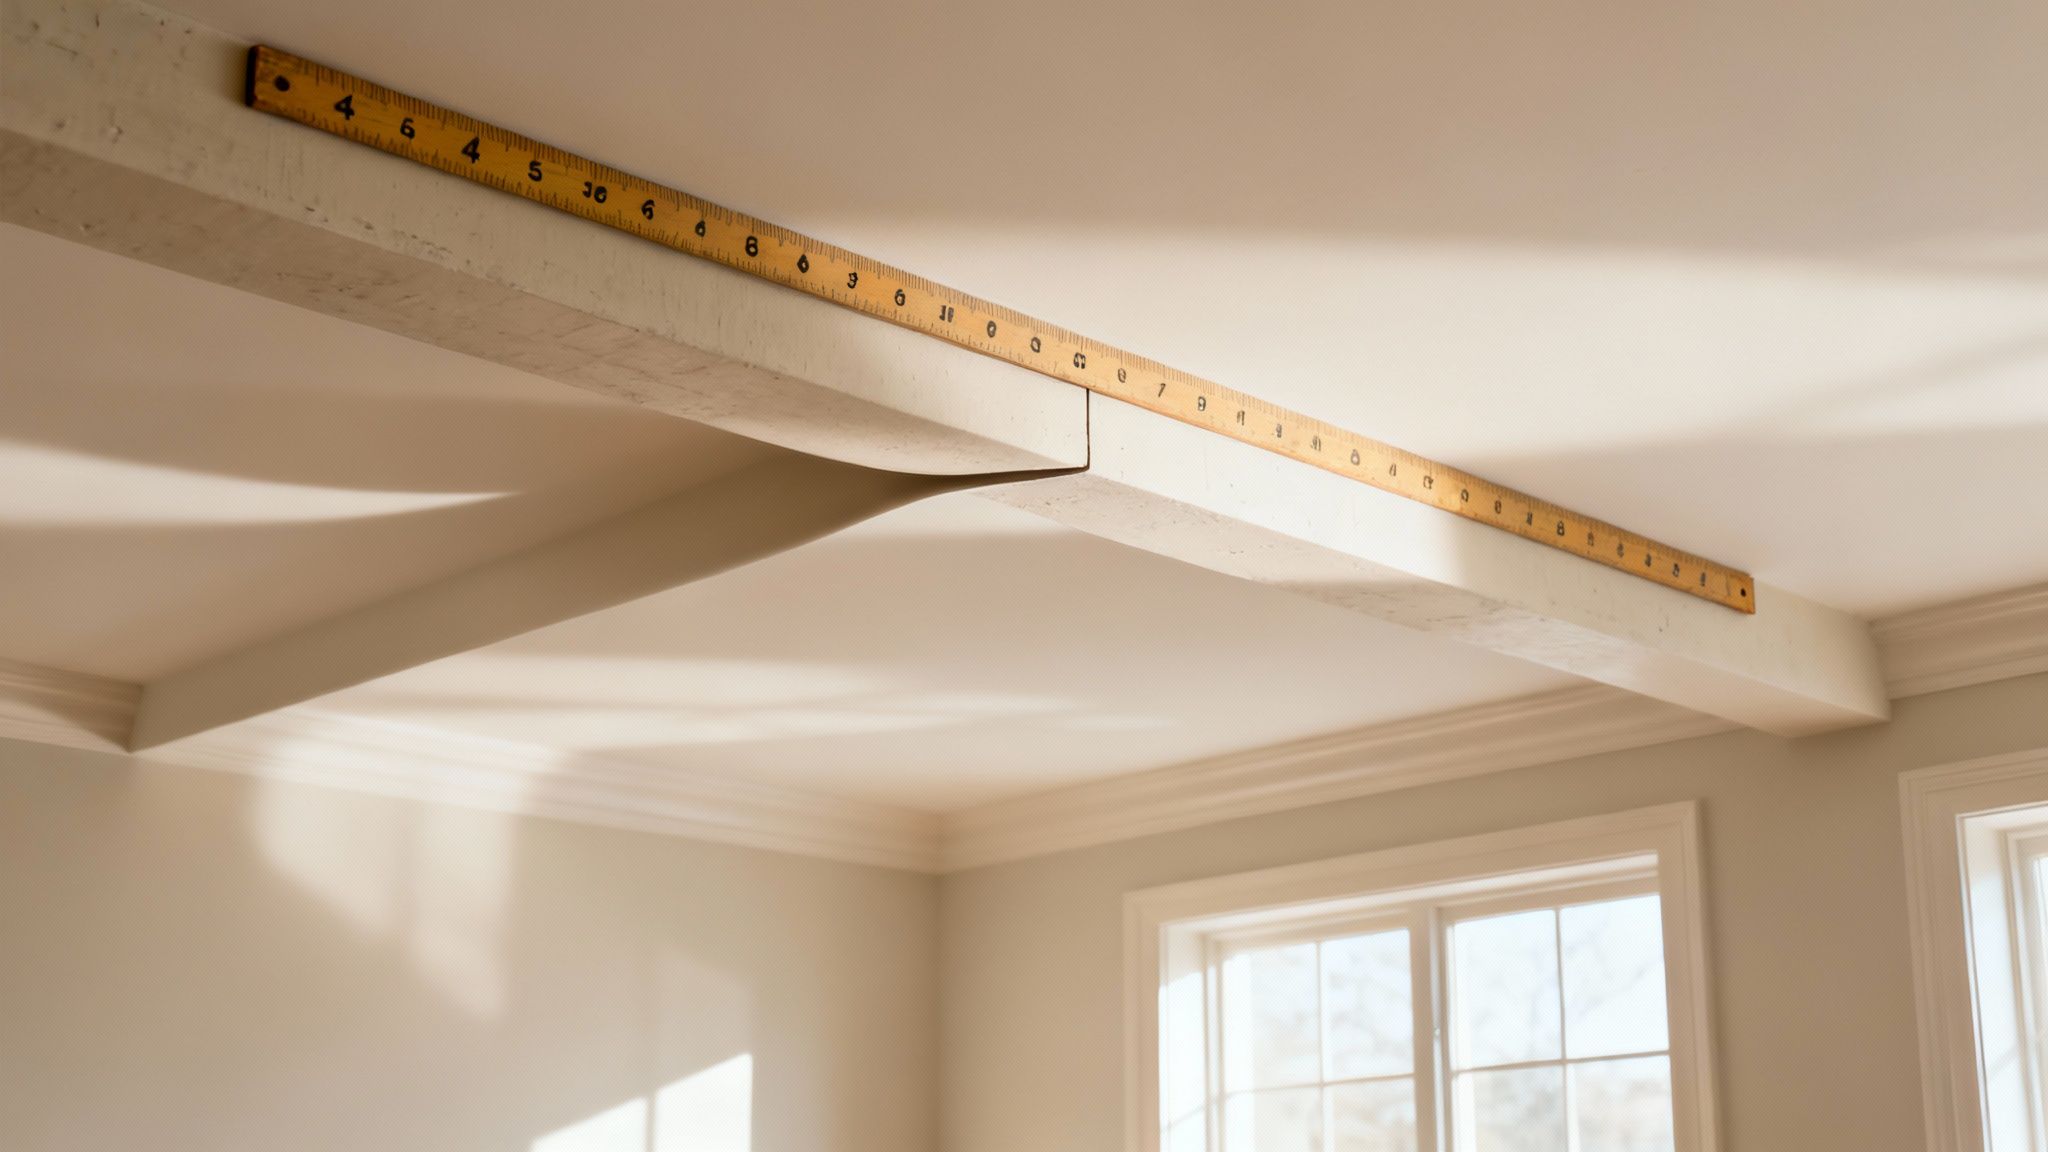
- Use a Straightedge: Hold a long, straight board or a level against the bottom of the beams and joists. If you see a gap in the middle, it means the wood is sagging.
- Look for Secondary Signs: Check for cracks in the ceiling drywall. Cracks that run across the direction of the joists are often a sign of stress and movement.
- Measure the Deflection: To get more technical, you can measure the gap at the center of a beam. A general rule is that the sag should not be more than the beam's length divided by 240.
- Check Support Posts: Make sure any posts holding up a beam are perfectly straight up and down and are not sinking or shifting.
Pro Tip: When you find a potential problem, take photos from different angles. This documentation is very helpful when you talk to a professional. It helps them understand the situation and plan the right fix within the overall home construction timeline.
5. Inspect Posts and Columns for Adequate Support and Stability
Posts and columns are the strong vertical supports in your home. They carry the weight from the roof and upper floors down to the foundation. This part of your framing inspection checklist makes sure these supports are the right size and are properly secured.
Why It's a Critical Support Check
If a post or column is not supported correctly, it can cause a chain reaction of problems. A single weak post in the basement can lead to sagging floors and cracked walls upstairs. In areas like Monterey and Santa Cruz Counties, where earthquakes are a risk, strong vertical supports are a key safety feature.
Actionable Inspection Tips
A good inspection means looking closely at each post and column to make sure it's stable and strong.
- Check for Plumb and Centering: Use a level to make sure each post is perfectly vertical (plumb). A post that leans even a little is not carrying weight correctly. Also, check that the post is centered on its concrete footing.
- Examine Connection Points: Look at the top and bottom of each post. The bottom should be secured and protected from moisture, especially in a basement. Look for any rust on metal connectors.
- Look for Crushing or Deformation: Check the wood at the very top and bottom of the post. If the wood fibers look crushed or splintered, it means there is too much weight on the post.
Pro Tip: Take pictures of every post, noting its size and how it's connected. This is great for your records. The Aldridge Construction team carefully checks every support to make sure it meets or exceeds engineering standards to prevent future problems.
6. Check for Proper Bracing and Lateral Support
A home's frame needs to be strong from side to side, not just up and down. This is called lateral support, and it helps the house resist forces like strong winds and earthquakes. Bracing acts like the muscles of the frame, keeping it from shifting or twisting.
Why It's a Critical Safety Step
Without good bracing, a house can be pushed out of its square shape during a storm or earthquake. This can cause the whole structure to fail. For homeowners in places like Santa Cruz County, checking for strong lateral support is a basic safety requirement.
Actionable Inspection Tips
Look for the parts of the frame that are designed to resist side-to-side movement.
- Look for Diagonal Bracing: Check for diagonal wood boards or metal straps, especially in the corners of the outside walls.
- Verify Sheathing Nailing: The plywood or OSB sheets on the outside of the frame are a huge part of the bracing. Make sure they are nailed correctly, with nails spaced close together around the edges.
- Inspect Connections: Make sure that metal connectors, like hurricane ties, are used to connect the roof to the walls. These stop the roof from lifting off in high winds.
Pro Tip: Take photos of all the bracing you see. If you are building in an area with high winds or earthquake risk, compare what you see to the building plans. Aldridge Construction makes sure every connection is up to code, so your home is ready for any regional challenges.
7. Examine Framing Around Openings (Windows, Doors, Chimneys)
When you cut a hole in a wall for a window or door, you interrupt the structure. Special framing is needed around these openings to carry the weight from above down to the foundation. This is a very important point on any framing inspection checklist.
Why It's a Critical Step
An opening in a wall creates a weak spot. Without a strong beam (called a header) across the top, the weight above can cause the frame to sag. This can make doors and windows stick and cause cracks in the drywall.
Actionable Inspection Tips
You can see if an opening is framed correctly by looking at the parts. You should see a system of a header, trimmer studs, and king studs working together.
- Check the Header Size: The header is the beam that runs across the top of the opening. The wider the opening, the bigger the header needs to be. A header that looks too small for a big window is a red flag.
- Verify Support Studs: Make sure the header is held up on each side by at least one trimmer stud (or jack stud). These should run from the header down to the bottom plate of the wall.
- Look for Sagging or Cracks: Look at the header to see if it's bowing in the middle. Also, look for cracks in the drywall coming from the corners of windows and doors. This is often a sign of a framing problem.
Pro Tip: Pay extra attention to new openings made during a remodel. Cutting into a wall that holds up the house without a proper plan is very dangerous. Aldridge Construction ensures all changes are properly engineered and meet local building codes. You can learn more about construction permit requirements.
8. Verify Framing Grade, Size, and Species Appropriateness
Not all wood is the same. Using the wrong type of lumber can cause big problems. Checking that the wood used in your home's frame is the right grade, size, and type for the job is a key part of your framing inspection checklist.
Why It's a Critical Check
Your home's strength depends on using the right materials. Using floor joists that are too small can make your floors feel bouncy. Using regular wood in a damp basement will lead to rot. In coastal climates like Monterey County, choosing the right lumber is even more important to fight moisture.
Actionable Inspection Tips
You can learn a lot by looking closely at the lumber itself. This check makes sure the materials being used match the building plans.
- Look for Grade Stamps: Every piece of framing lumber has a stamp on it. This stamp tells you the type of wood (like Douglas Fir), its moisture level, and its grade (usually No. 2 or better).
- Measure Dimensions: A "2×4" is not actually 2 inches by 4 inches. Its real size is 1.5 inches by 3.5 inches. Use a tape measure to check that key parts like beams and joists are the size shown in the plans.
- Check for Pressure-Treated Wood: Any wood that touches concrete, like the wood on top of the foundation, must be pressure-treated to prevent rot. This wood often looks greenish.
Pro Tip: Have a copy of your building plans with you during the inspection. Compare the lumber sizes and grades in the plans to what you see on site. This is a standard part of the Aldridge Construction custom home building process, ensuring every material meets our high standards for a strong and lasting home.
8-Point Framing Inspection Comparison
| Inspection Item | Implementation Complexity 🔄 | Resources & Tools ⚡ | Expected Effectiveness ⭐ 📊 | Ideal Use Cases | Key Advantages 💡 |
|---|---|---|---|---|---|
| Check for Water Damage and Rot | Moderate — visual + probing; hidden areas raise complexity | Moisture meter, flashlight, screwdriver, camera | ⭐⭐⭐⭐ — high when accessible; hidden rot can reduce detectability | Post-flood, roof leaks, seasonal checks | Prevents structural failure; allows early remediation and cost savings |
| Verify Proper Nailing and Connection Methods | Moderate–High — many fasteners hidden; may require opening panels | Magnet, inspection camera, access panels, code references | ⭐⭐⭐⭐ — reliable for visible connections; hidden areas need invasive checks | Post-storm, older homes, renovation inspections | Ensures load path continuity, code compliance, improved resilience |
| Assess Structural Cracks and Wood Splitting | Moderate — needs expertise to classify severity and monitor progression | Crack gauges, measuring tools, tape, camera | ⭐⭐⭐ — identifies issues early but severity often requires specialist review | Foundation settlement, post-event damage, unexplained movement | Prioritizes repairs, documents issues for insurance and repairs |
| Evaluate Beam and Joist Sagging or Deflection | Moderate — measurement and engineering evaluation often required | 4–6 ft straightedge, laser level, tape, engineering consult | ⭐⭐⭐⭐ — effective at detecting deflection; repair decisions need engineer | Uneven floors, removed load-bearing walls, heavy roof loads | Detects load problems early; informs reinforcement or replacement |
| Inspect Posts and Columns for Adequate Support and Stability | Moderate — some posts hidden; precise plumb and bearing checks needed | Level, measuring tape, camera, post-sizing guides | ⭐⭐⭐⭐ — strong when visible; hidden footing issues may limit assessment | Basements, porches, additions, settling foundations | Prevents catastrophic load failure; verifies proper load transfer |
| Check for Proper Bracing and Lateral Support | High — code-dependent and often partially concealed; retrofits complex | Visual inspection, sheathing checks, code references, engineer | ⭐⭐⭐⭐ — crucial for lateral resistance; full verification can be invasive | Seismic zones, hurricane-prone areas, structural retrofits | Prevents frame racking; improves safety and insurance compliance |
| Examine Framing Around Openings (Windows, Doors, Chimneys) | Moderate — headers/trimmers may be concealed; retrofits require temporary support | Tape measure, level, header span tables, camera | ⭐⭐⭐⭐ — effective at preventing concentrated failures when assessed | Window/door installations, remodels, chimney penetrations | Ensures safe load transfer around openings; reduces water intrusion |
| Verify Framing Grade, Size, and Species Appropriateness | Moderate–High — grade stamps may be missing and capacity may need analysis | Measuring tools, grade references, species guides, photos | ⭐⭐⭐ — important for long-term adequacy; expert review sometimes needed | Additions, older homes, high-moisture areas | Prevents material inadequacy, ensures code compliance and durability |
Frequently Asked Questions (FAQs)
1. What is the most important thing to look for during a framing inspection?
The most critical items are signs of water damage, proper connections (nailing and metal hardware), and ensuring load-bearing elements like beams and headers are sized and supported correctly. These form the foundation of a safe structure.
2. Can I do a framing inspection myself?
A homeowner can use this checklist to spot obvious red flags and ask informed questions. However, this guide does not replace a professional inspection by a city/county building inspector or a qualified third-party inspector, which is often required to get a permit signed off.
3. When does the framing inspection happen during construction?
The framing inspection occurs after the rough plumbing, electrical, and HVAC systems are installed but before any insulation or drywall goes up. This is often called the "rough-in" or "pre-drywall" inspection.
4. What happens if the inspector finds a problem?
If an issue is found, the inspector will issue a correction notice. The contractor must fix the problem, and then the work must be re-inspected and approved before construction can continue. This is why working with a quality-focused builder like Aldridge Construction is so important—we aim to pass inspections the first time.
5. How do framing requirements differ between California and Arizona?
Framing requirements are generally based on the International Building Code (IBC), but local jurisdictions make amendments. For example, coastal California counties like Monterey and Santa Cruz have stricter seismic bracing requirements due to earthquake risk. Parts of Maricopa County, Arizona may have specific considerations for extreme heat and monsoon winds.
A perfect frame is the standard for every Aldridge Construction project. If you are planning a custom home, addition, or major remodel in Monterey, Santa Cruz, San Benito, or Maricopa County, work with a team that puts structural quality first.
Contact Aldridge Construction today for a consultation. Let us show you how our commitment to expert craftsmanship can build your vision on a foundation you can trust for a lifetime.